
Configuration Settings
To check the configurations, the admin needs to navigate to CED Marketplace > Vendor Configuration > Booking > Booking System
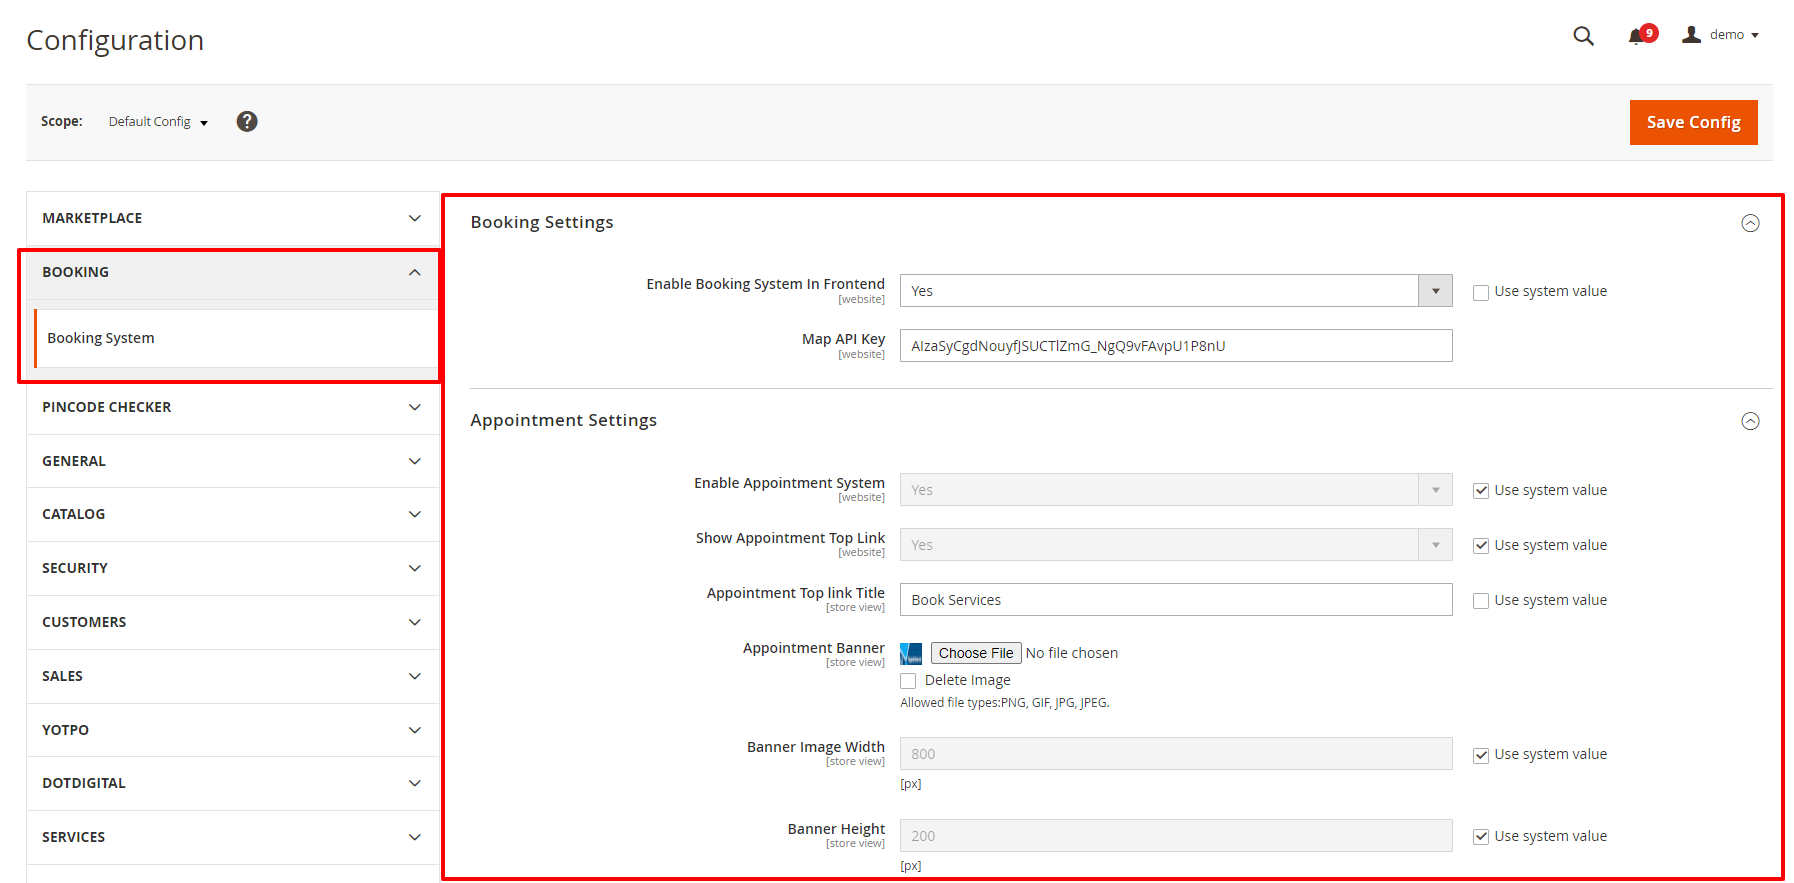
- Enable Booking System: Here the admin needs to select (Yes / No) if the Admin select Yes, then the feature of the booking will be available for the marketplace. If the Admin Select the option No, then the feature of the booking will not be available in the marketplace.
- MAP API Key: Here the Admin needs to provide the Google API Key
- Enable Appointment System: Admin needs to enable this Yes to avail the feature of Appointment Scheduling and access all the features related to that.
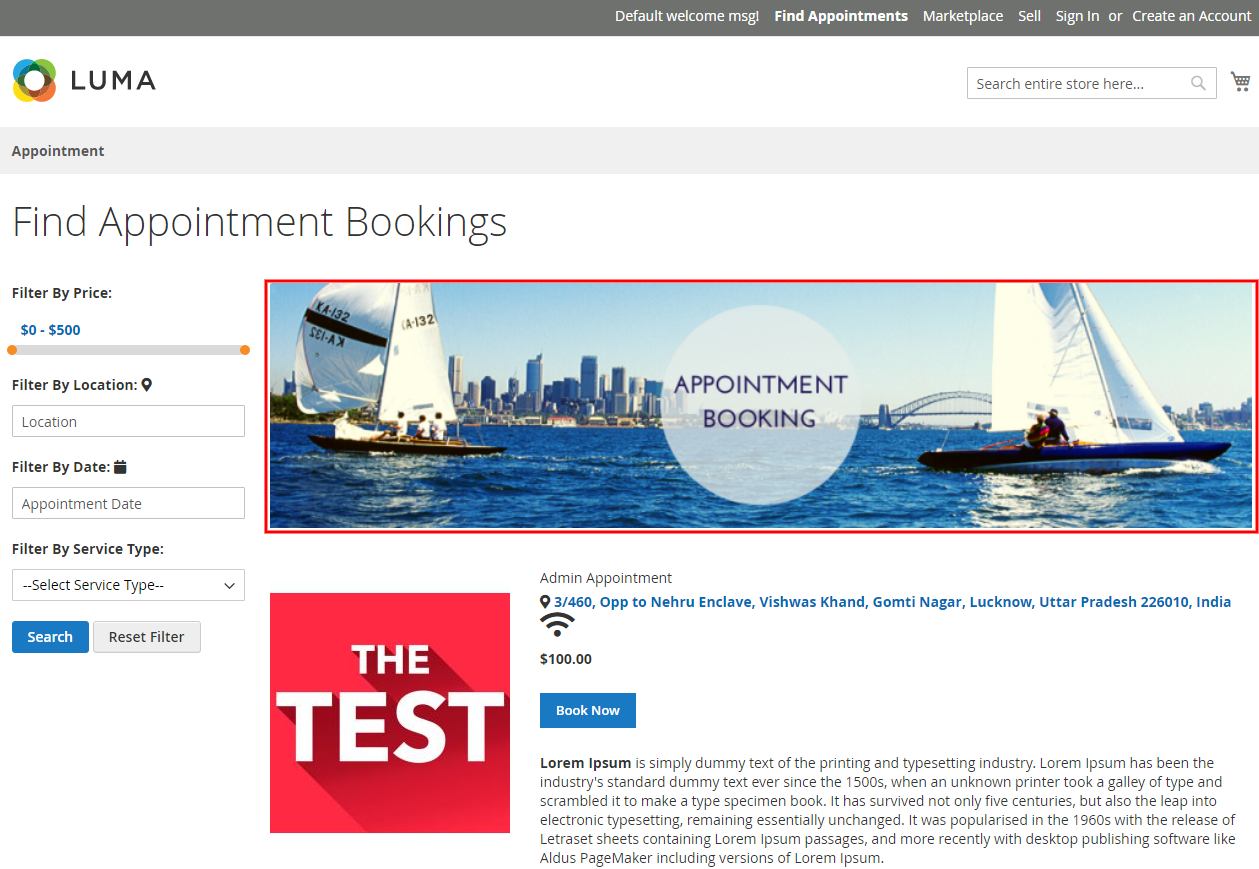
- Show Appointment Top Link (Yes / No): If the admin wants to set the top link for appointment on the header of his store, he selects Yes; as from this link customer can directly jump to the Appointment page where all the booking services are listed at one place.

- Appointment Top Link Title: This is the Text field, here the admin enters the Text that he wants to get displayed on the Top Link for Appointment.
- Appointment Banner: Here the admin can upload the Banner which is displayed on the Appointment Landing Page, Admin can upload the image type i.e. png/gif/jpg/jpeg
- Banner Height /Width: In the Below 2 field admin can set the specific required height and width of the banner size if he requires any.
×


