Vendor Account Management
Goto CED Marketplace > Manage Vendors to manage vendor accounts.
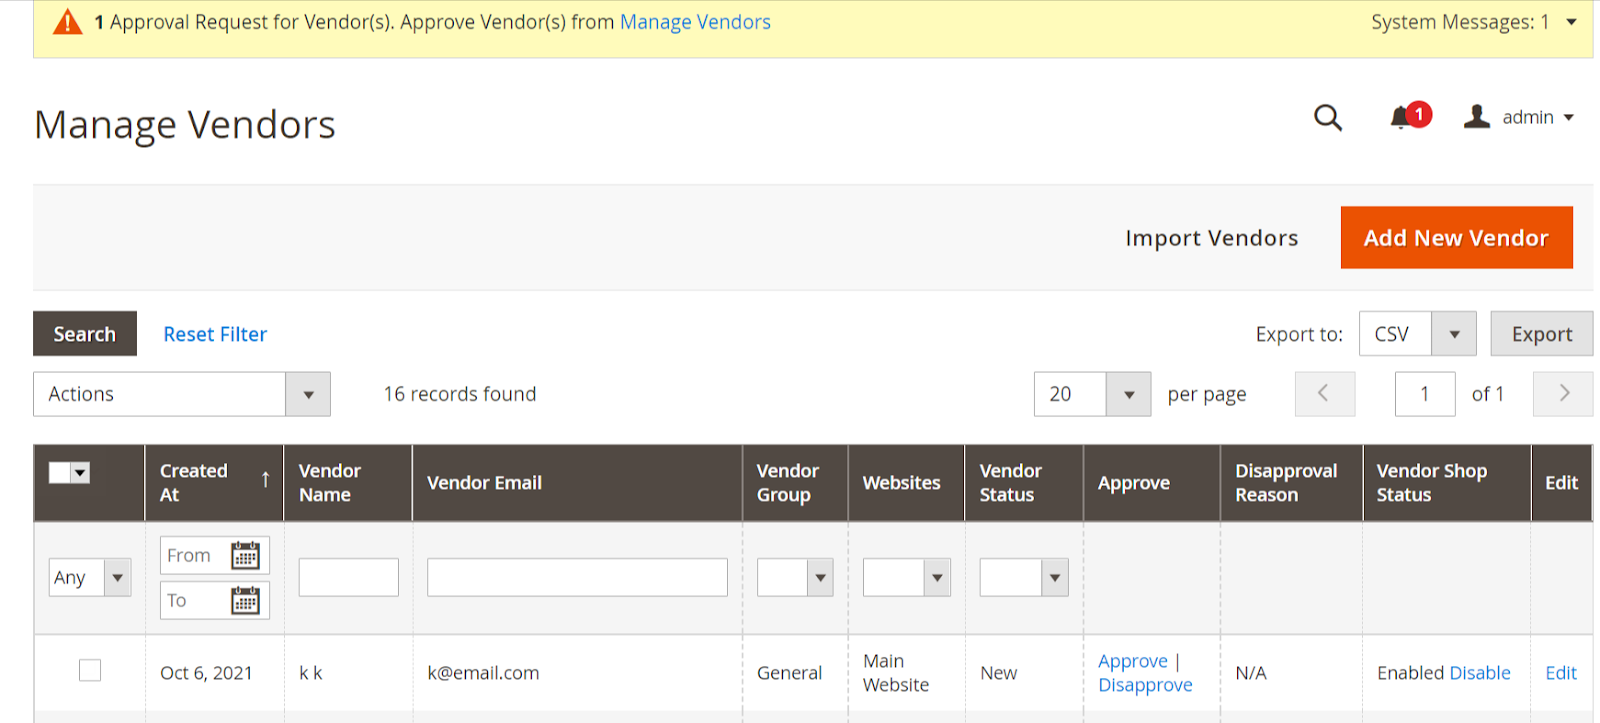
System Message: System Message appears at the top of the workspace when a vendor account requires approval.
Follow the link to “Manage Vendor”, and review the new vendor account.
Export Vendors: Export details about all vendors in CSV or XML format.
Actions: List of actions applicable to selected vendors in the list. Select the checkbox in the first column of each vendor to apply an action. Options: Delete / Change Account Status / Change Shop Status.
Search: Initiates vendor search based on the current selection or input in columns.
Vendor Since: The date of creation of the vendor account.
Name: The first and last name of the vendor.
Email: The email address of the vendor.
Vendor Group: The vendor group to which the vendor is assigned.
Web Site: The website in the store hierarchy to which the vendor account is associated.
Update Account Status: Option to update/change the vendor account status.
Account Status: Indicates the current status of the vendor account. Options: New, Approved and Disapproved.
Disapproval Reason: This shows the reason provided while disapproving the vendor account.
Shop Status: Indicates the current status of the vendor shop and gives the option to change to alternate status.
Status(Option): Enabled(Disable) and Disabled(Enable).
Edit: Opens the vendor in edit mode. You can accomplish the same thing by clicking anywhere on the row.
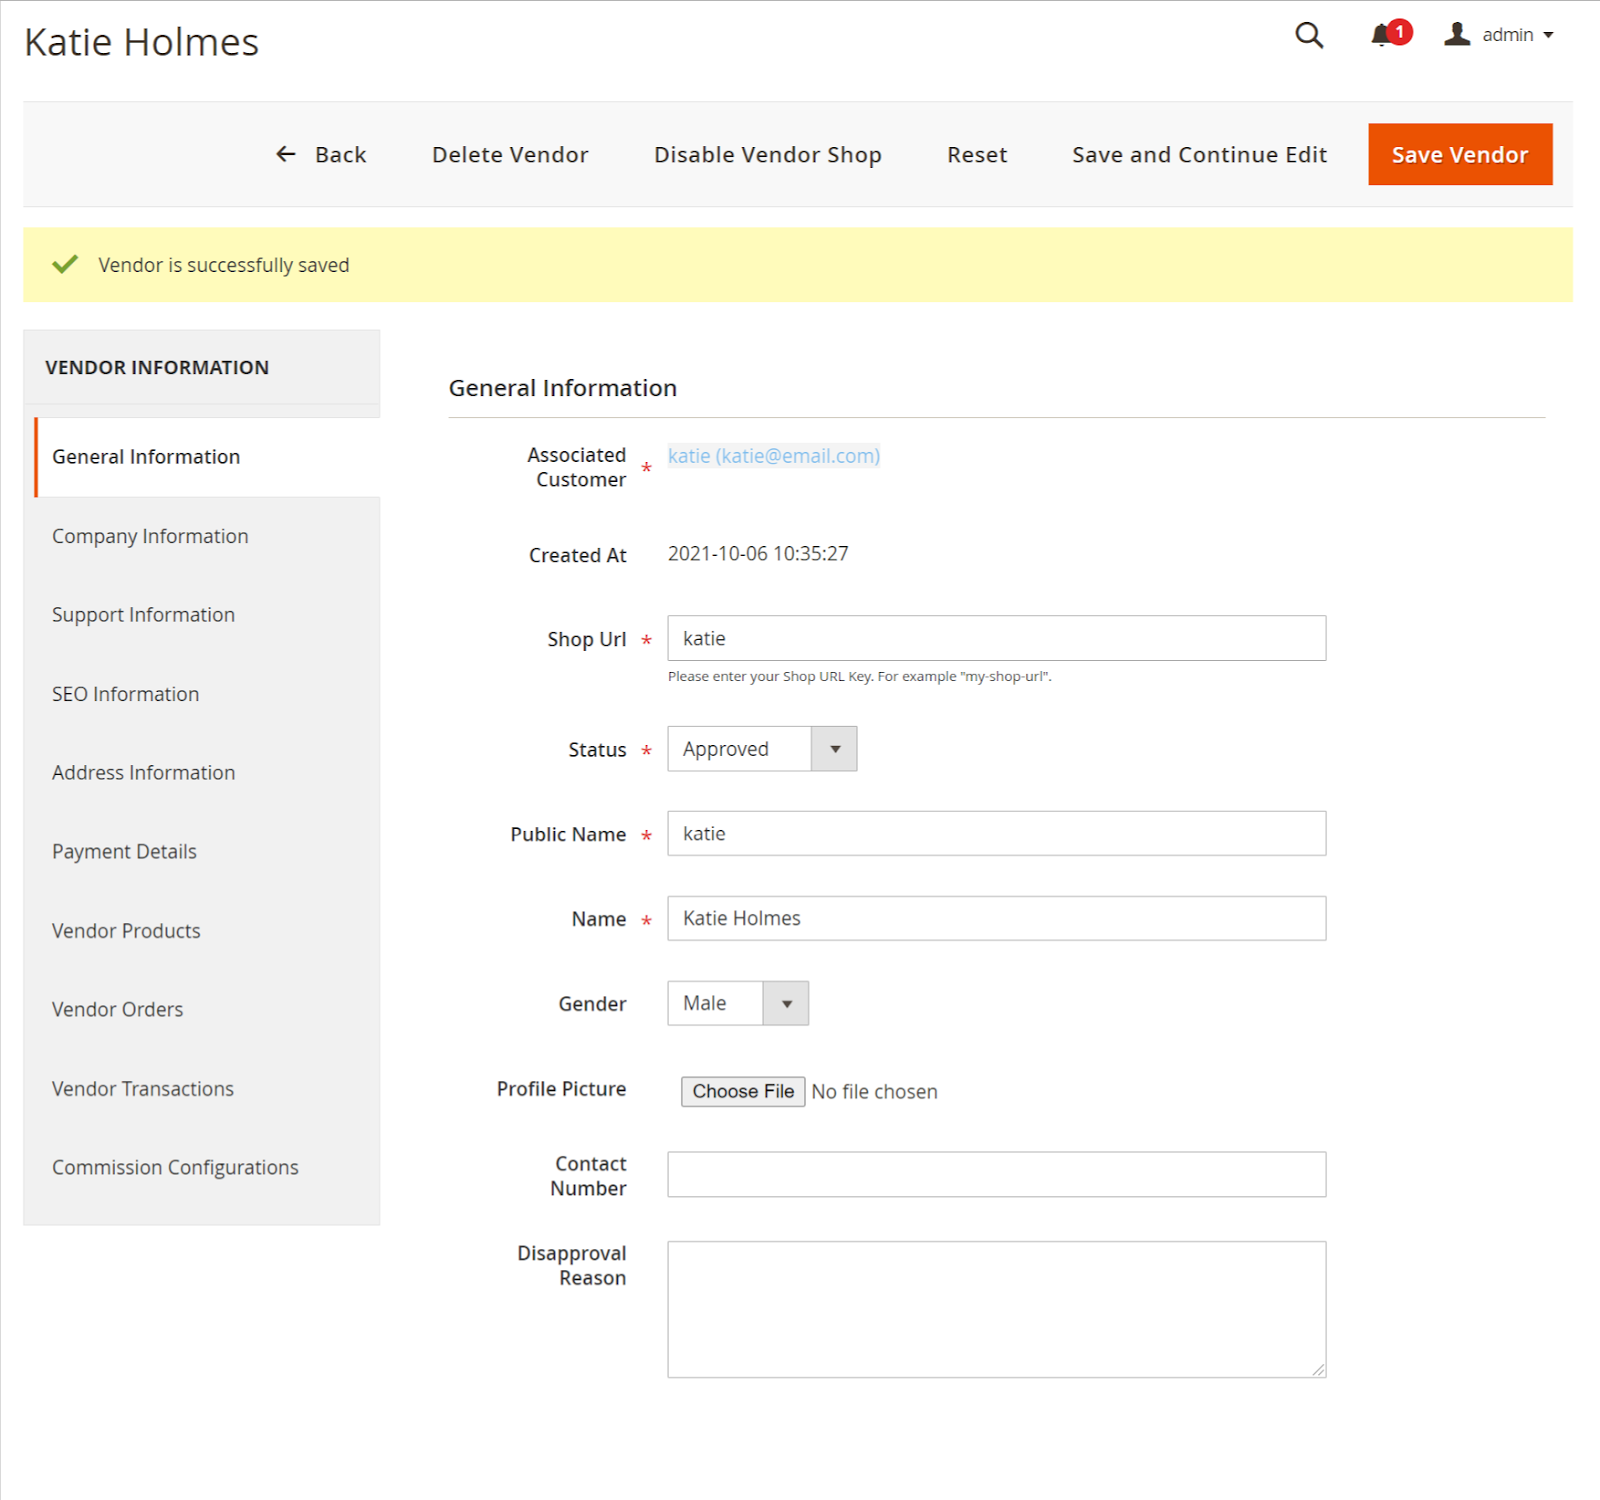
Vendor Details: Information available under the left menu tabs: General Information, Company Information Support Information, SEO Information, and Address Information corresponds to the profile information provided by the vendor. Payment Details correspond to the Transaction Settings information provided by the vendor. Admin uses these details for processing vendor payouts. Admin can access vendor-specific products, orders, and transactions from the Vendor Products, Vendor Orders, and Vendor Transaction tabs respectively.
Add Vendor: Initiate the process to create a new vendor account. Select an existing customer account or create a new customer for the vendor account.

Enter the required vendor information to create the vendor account associated with the selected customer.
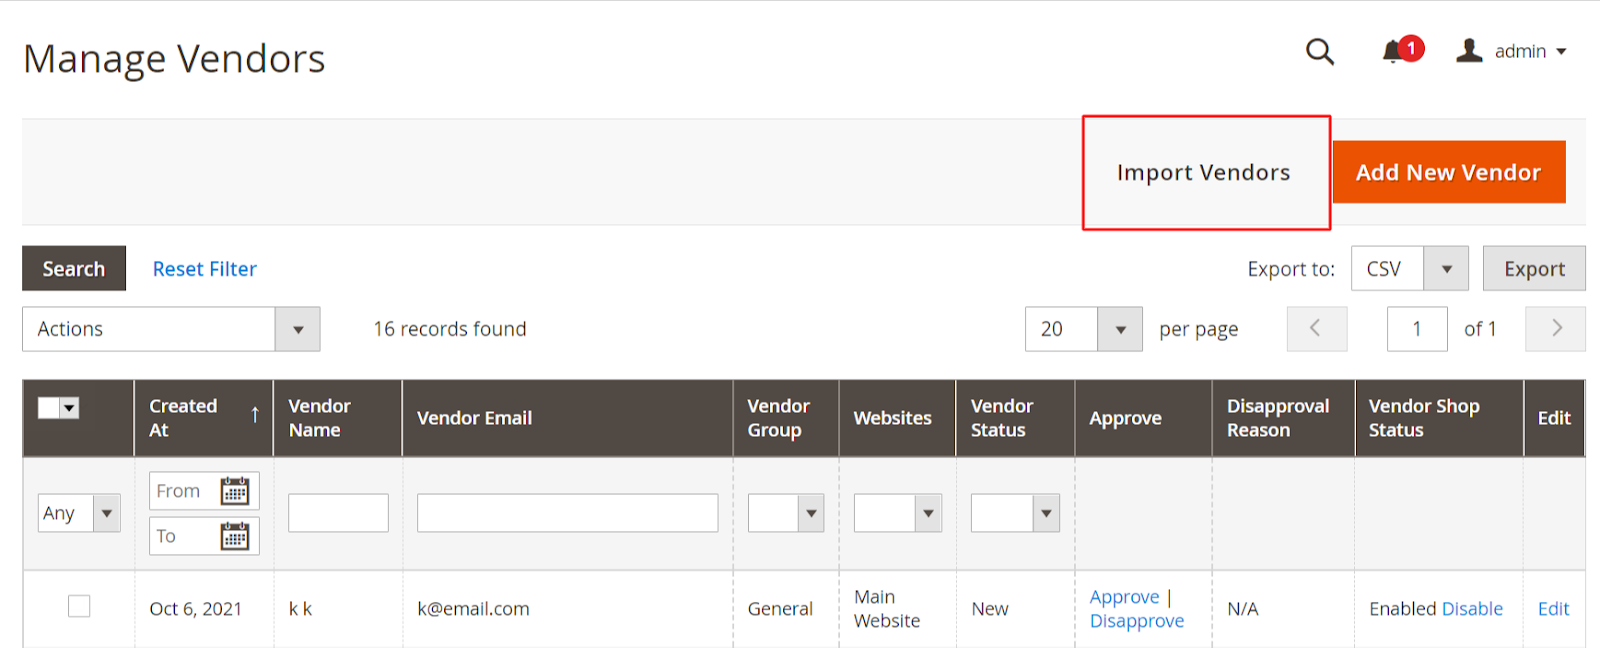
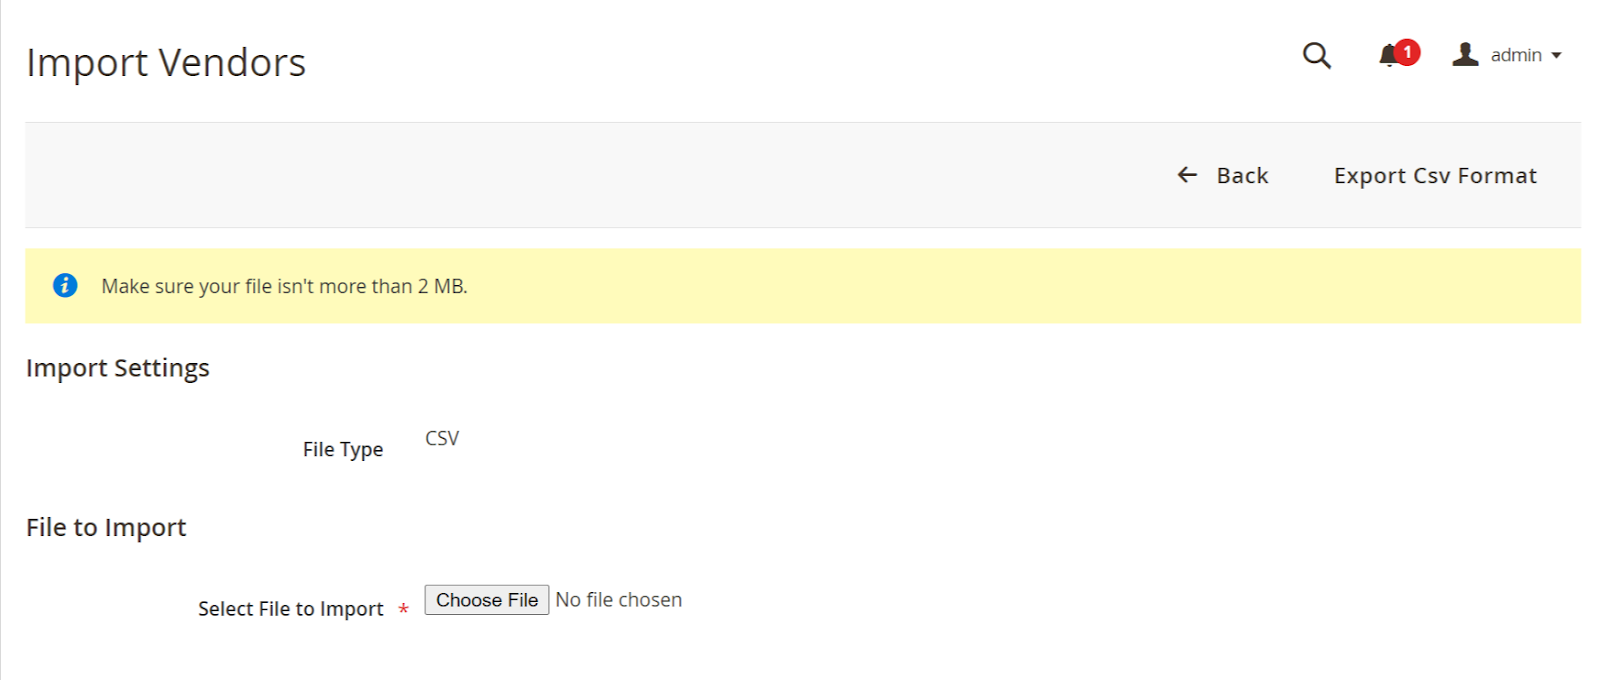
Vendor Import: Create vendor accounts in bulk with the help of a CSV file