
Bol Configuration Settings
Once the module gets installed, you get navigated to the Configuration page.
To perform configuration settings:
- Go to the Prestashop Admin panel.
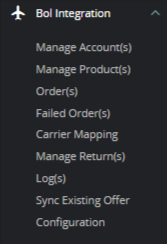
- In the left navigation panel, place the cursor on Bol Integration and the section expands as:
- Click on Configuration
The page appears as shown in the figure:
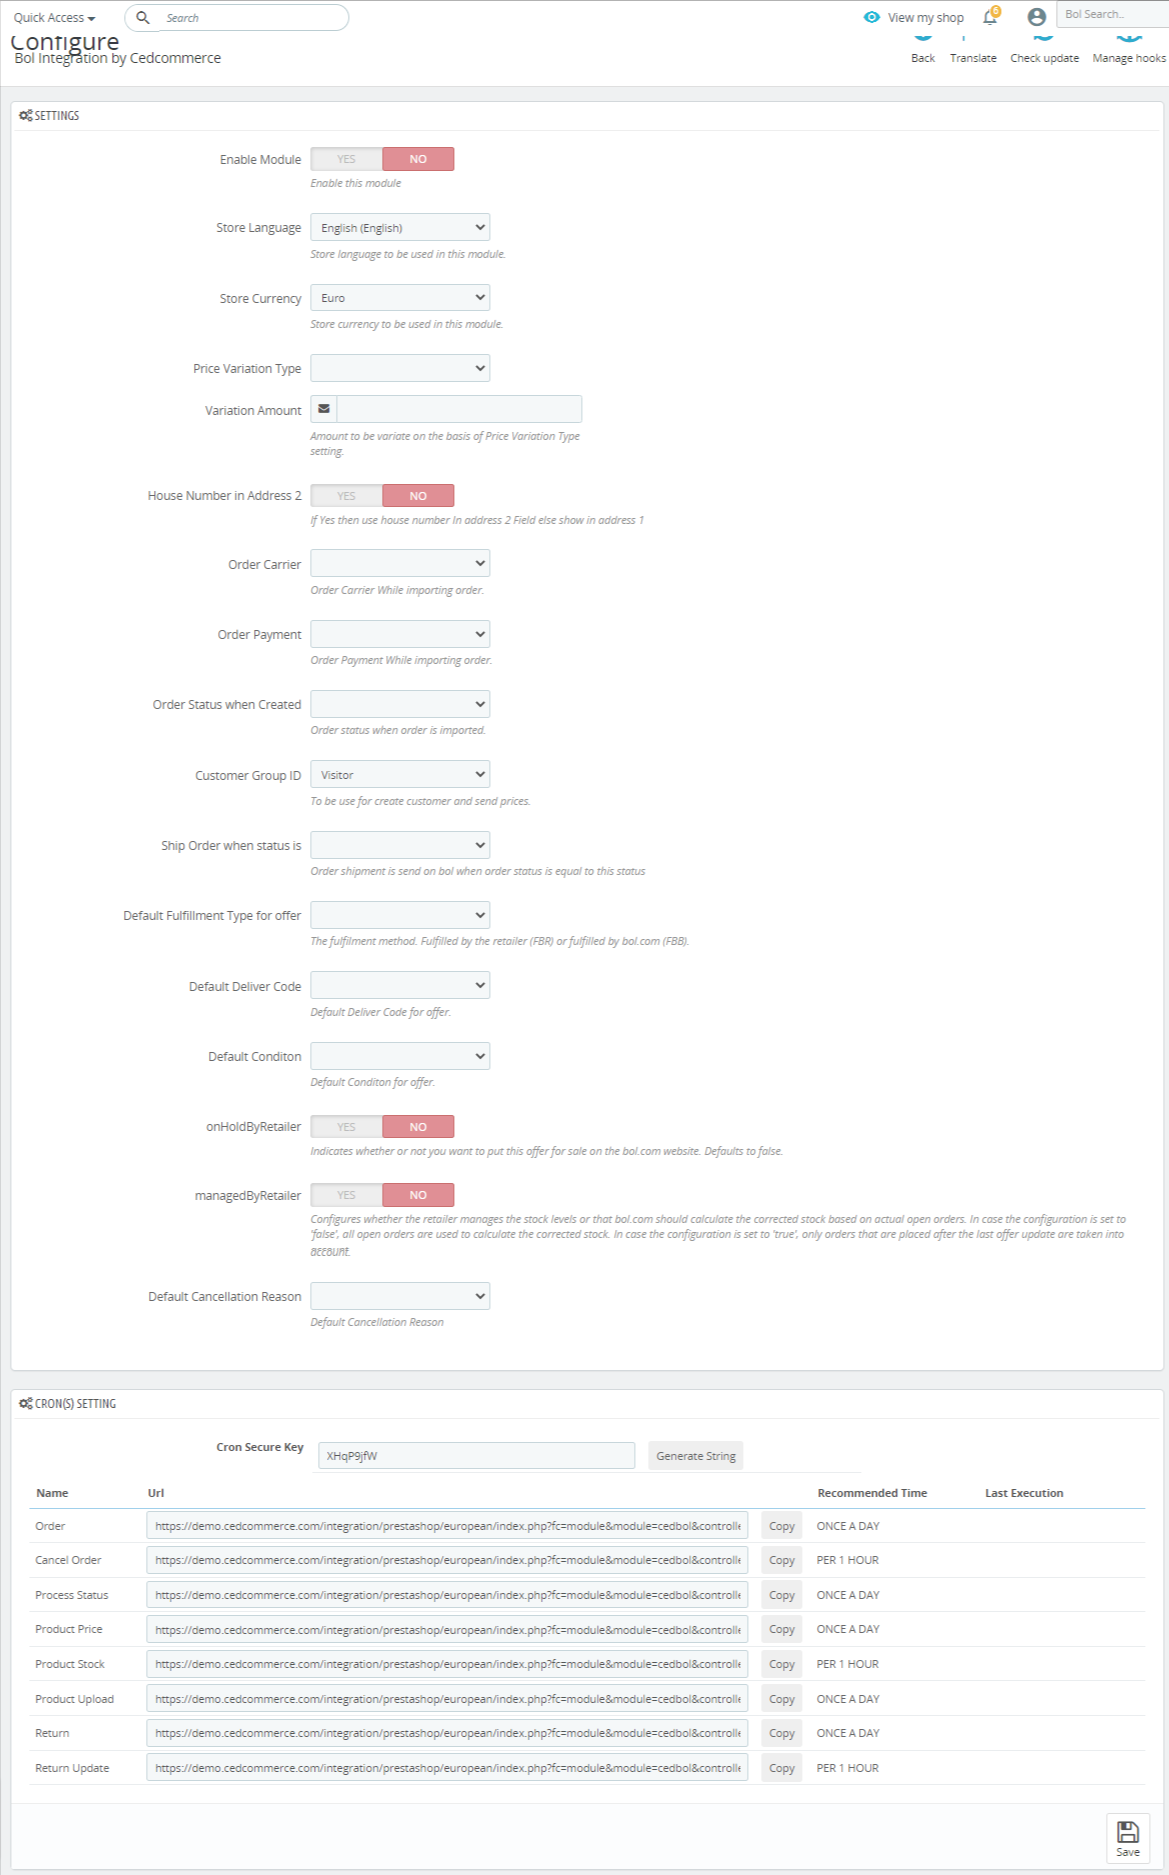
- In the Settings, do the following steps:
- In the Enable Module, select ‘Yes‘ to enable the module.
- In the Store Language, select the store language to be used in the module.
- In the Store Currency, select the store currency.
- In the Price Variation Type, choose price variation type, Increase by Fixed amount, or Fixed Percentage
- In the Yes then use house number In address 2 Field else show in address 1
-
In the Order Carrier, choose the order carrier while importing orders.
-
In the Order Payment, choose the order payment while importing orders.
- In the
- he fulfilment method. Fulfilled by the retailer (FBR) or fulfilled by bol.com (FBB).
- In the Default Delivery Code, choose the default delivery code for the offer.
- In the Default Condition, you can choose the product condition.
- In the onHoldbyRetailer, select ‘Yes’ to indicates whether or not you want to put this offer for sale on the bol.com website. Defaults to false.
- In the managedbyRetailer, select ‘Yes’ to Configures whether the retailer manages the stock levels or that bol.com should calculate the corrected stock based on actual open orders. In case the configuration is set to ‘false’, all open orders are used to calculate the corrected stock. In case the configuration is set to ‘true’, only orders that are placed after the last offer update are taken into account.
- In the Default Cancellation Reason, you can choose the reason as well for cancel orders.
- In the last Cron Settings, do the following steps:
- In Cron Secure Key, you can make a combination of secure key consisting of the alphabet, number, and special characters.
- You may see cron URL, name and recommended time.
- Click the Save button and the configuration will be saved.
×


