
Configuration Settings
Once you have installed the module, you can see the Configuration page as shown below.
You may fill the details as below:
General Settings:
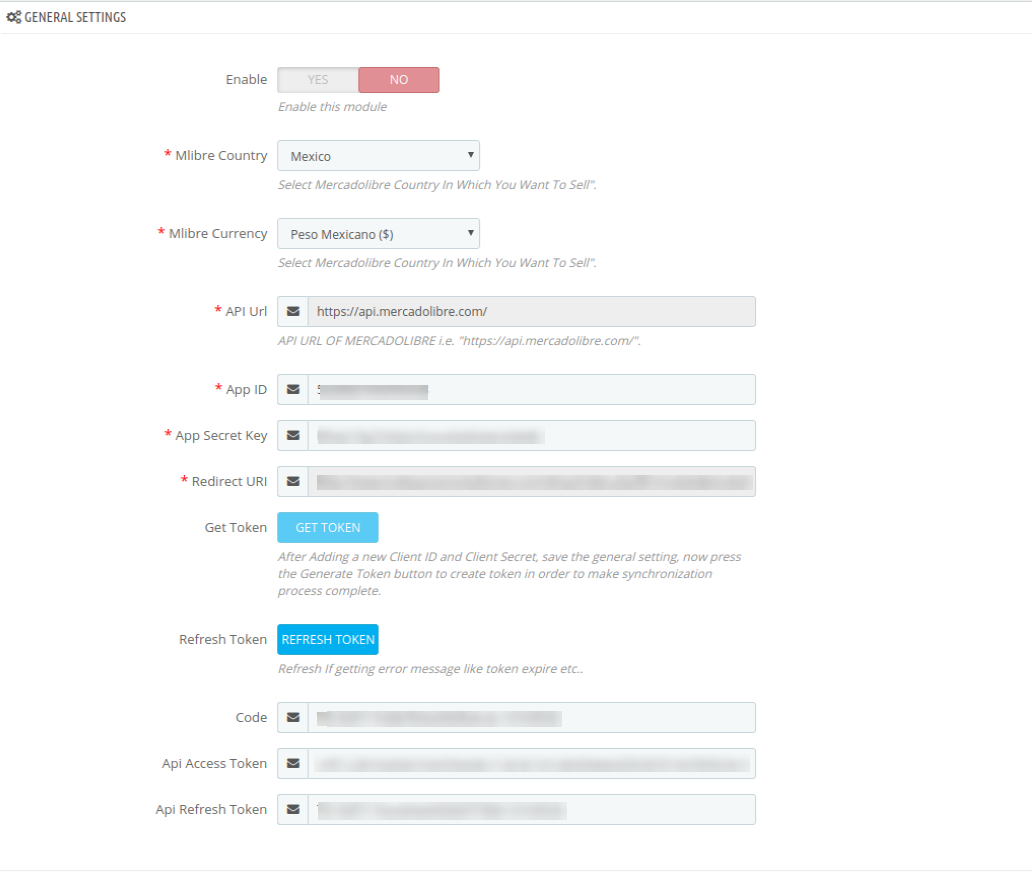
- In the Enable part, select Yes so that your module gets enabled.
- In the Mlibre country, Select the country.
- In the Mlibre currency, select the currency
- In the App ID bar, enter the ID that you had retrieved from the Mercadolibre Seller Panel.
- In the App Secret key bar, enter the ID that you had retrieved from the Mercadolibre Seller Panel.
You will get the App ID and App Secret Key from http://developers.mercadolibre.com/
Simply, click on the above site and select your country accordingly. After selecting the country, you can create a login or sign up here:
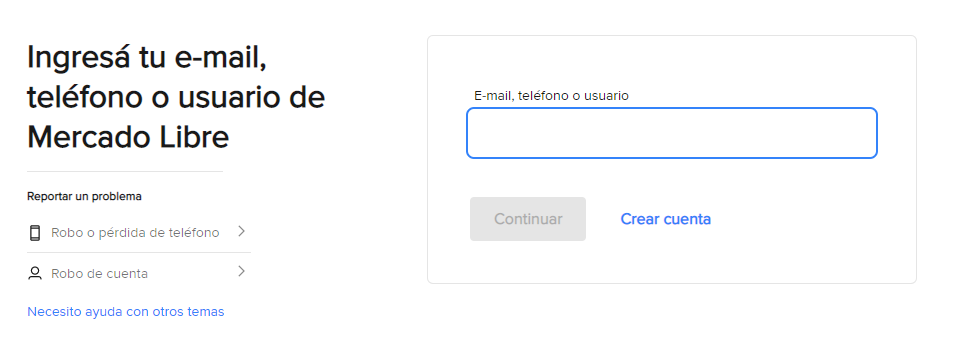
After login, create an app on Mercadolibre and put the redirect URL and Notification Backoffice URL. Copy the URLs from the configuration page and paste them into your app and provide all permissions.
Once you saved the settings, you will get the APP ID and APP Secret. Copy both the details and paste them into your configuration. First, save the credentials and after that click on Get Token button and Refresh Token (If getting an error message like the token expire etc).
- In the following three bars i.e., Code, API Acess Token, and API Refresh Token, the details get filled automatically once you have clicked Get Token and Refresh Token button.
- Once done with this section, click on the Save button on the right corner of the same section.
Product Settings:
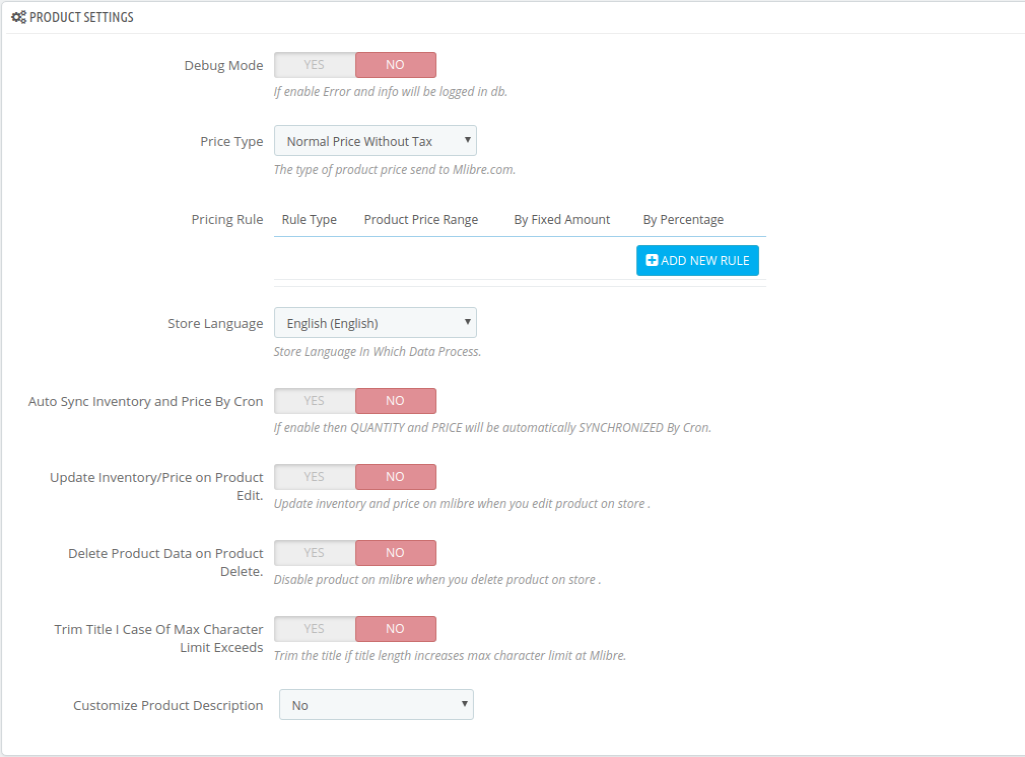
- In the Debug Mode, select the enable find the error.
- In the Price Type, select either Normal Price Without Tax or Normal Price With Tax. Note that this is the type of product price to be sent to Mercadolibre.com.
- In Pricing rule,
- Click on the new rule button, to variate your Mercadolibre price with your PrestaShop store.
- In the Store Language, select the language in which you want the data to be processed.
- In the Auto Sync Inventory and Price By Cron, If enabled the inventory and price will automatically get sync with Mercadolibre.
- In the Update Inventory/Price on Product Edit, select Yes or No, if you want the inventory and price to be updated on Mercadolibre when you edit product on the store .
- In the Delete Product Data on Product Delete, select Yes or No, if you want to disable product on Mercadolibre when you delete product on the store.
- In the Trim Title, I Case Of Max Character Limit Exceeds, It will crop the characters of title on Mercadolibre if it exceeds.
- In Customize Product Description, It allows the seller to change the description of the product.
Order Settings:
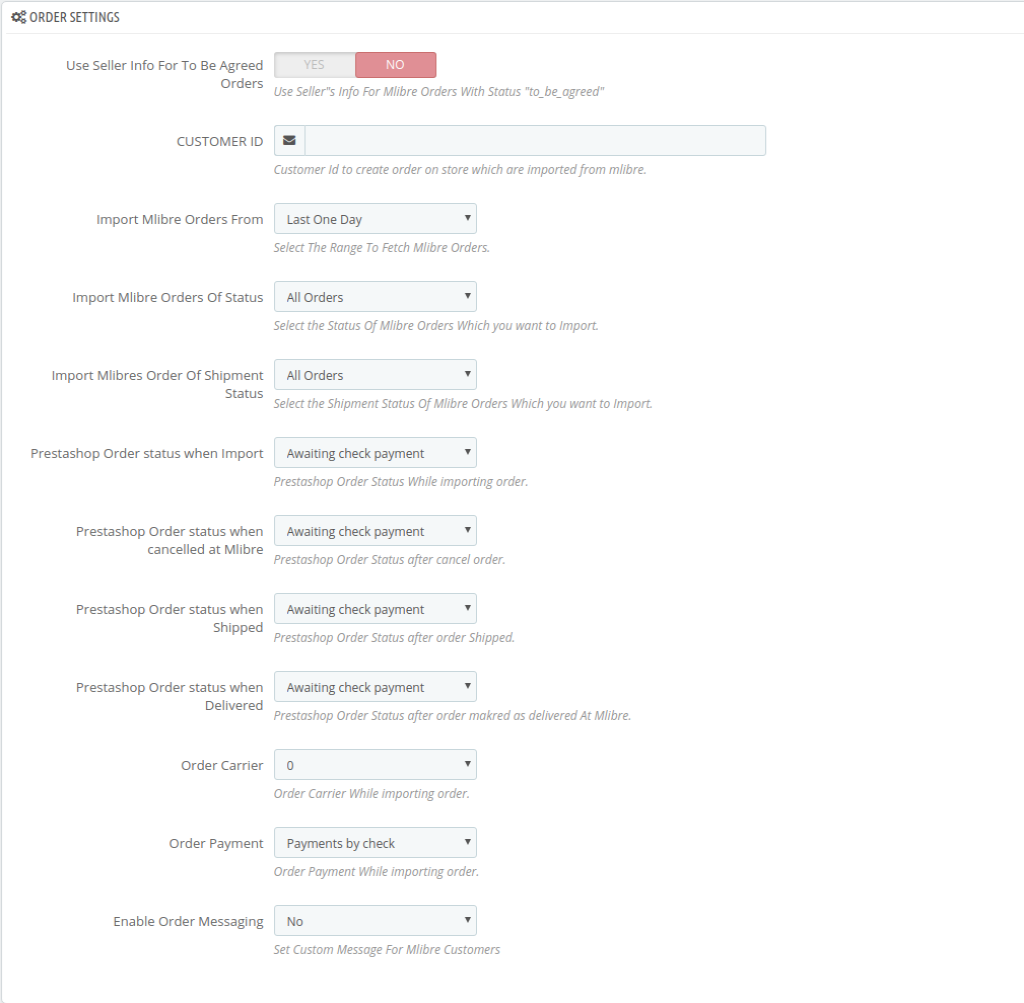
- In the Use Seller Info For To Be Agreed Orders, select yes to choose seller’s info of Mlibre.
- In the CUSTOMER ID, enter the ID for customers to be created, for orders which are imported from Mlibre.
- In the Import Mlibre Order of status, select the order status while importing the order.
- In the Order status when cancelled at Mlibre, select the status to appear when the order has been cancelled.
- In the Mlibre Order shipment status, select the order status to appear when the order has been shipped.
- In the Order Carrier, select the order carrier set for particular orders while importing the Mlibre order.
- In the Order Payment, select the order payment method set for each order while importing the Mlibre order.
- In the Enable order Messaging, Select yes to set the custom message for Mlibre customers.
Once you are done with entering and selecting all these needed information, click on Save Config to save all the configuration settings you have made changes for.
Your configuration will be saved.


