
ManoMano Configuration Settings
Once the extension is successfully installed in the Magento store, the ManoMano menu appears on the top navigation bar of the Admin Panel. The merchant has to first create a seller account in the ManoMano seller panel.
To create a seller account, the store owner (admin) has to send an introductory email to the seller.services@manomano.co.uk email id with respect to the seller company. After assessment of the seller request and the possibility of a partnership, ManoMano proceeds further for the next step.
Once the seller account is created and is approved by ManoMano, they provide the username and password of the seller account to the admin. The Magento store owner can use the ManoMano Username and Password while setting up the ManoMano Configuration settings in the Magento Admin panel.
To set up the configuration settings in the Magento Admin panel
- Go to the Magento Admin panel.
- On the top navigation bar, point to the Manomano menu.
The menu appears as shown in the following figure:
- Click Configuration.
The Mannomano Configuration page appears as shown in the following figure: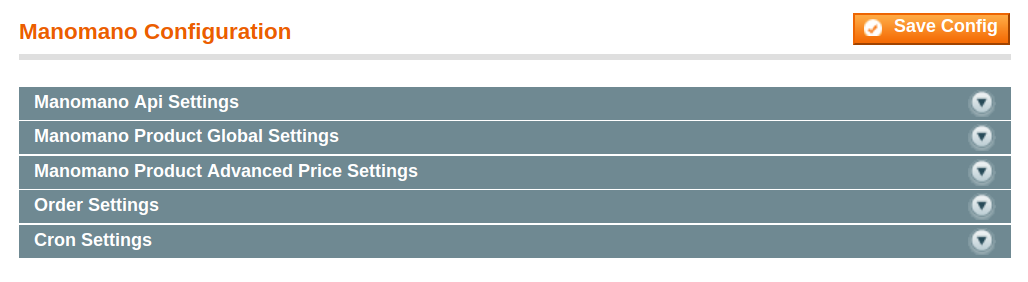
- Click the Manomano API Settings tab.
The tab is expanded and the corresponding fields appear as shown in the following figure: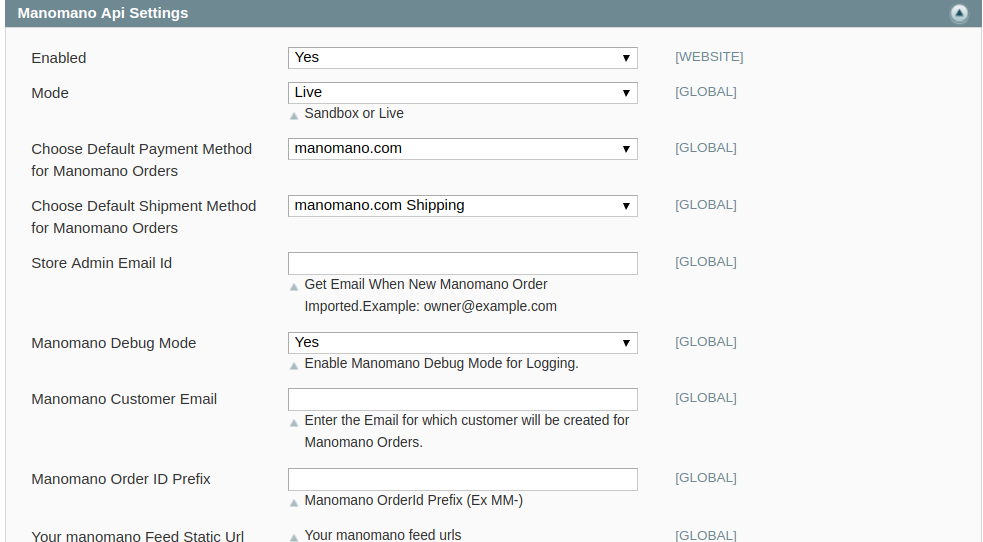
- Under Manomano API Settings, do the following steps:
- In the Enabled list, select Yes to enable the Manomano Integration extension.
- In the Mode column, Select Live from the drop-down menu. Unless you choose it live the changes made will not get reflected on the Manomano marketplace.
- In the Choose Default Payment Method for Manomano Orders list, select Manomano Orders.
- In the Choose Default Shipment Method for Manomano Orders list, select Manomano Orders.
- In the Store Admin Email Id box, enter the required email Id.
- In the Manomano Debug Mode list, select Yes to start ManoMano Integration in the debug mode.
It captures the log for the debug process. - In the Manomano Customer Email box, enter the required email Id used for the orders requested by the ManoMano customers.
- In the Manomano Order ID Prefix box, enter the required prefix value.
For instance, enter MN- for MN-10001. - The Manomano Feed Static URL list gets updates as soon as you upload any product. This feed URL needs to be registered on ManoMano seller account so that as soon as you upload a product it gets fetched to ManoMano.
- Click the Save Config button to save the API settings.
- Click the Manomano Product Global Settings tab.
The tab is expanded and the relevant fields appear under the Manomano Product Global Settings section as shown in the following figure: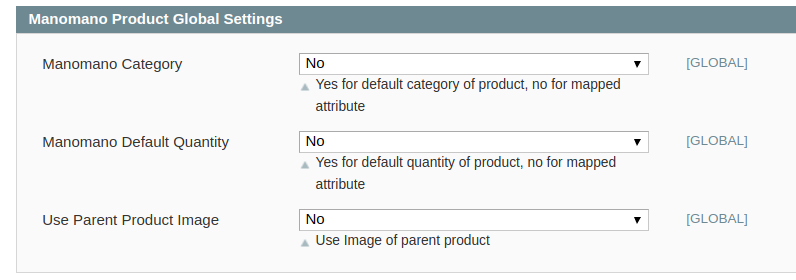
- Under Manomano Product Global Settings, do the following steps:
- In ManoMano Category Select Yes. By doing so the default category of the product will be selected. If you choose No, then the mapped attribute will be uploaded.
- Similar is the case for ManoMano Default Quantity. Choose No if you wish you upload mapped attributes otherwise Yes.
- If you wish to use parent product image then choose YES in the Use Parent Product.
- Click the Save Config button to save the entered values.
- Click the Manomano Product Advanced Price Settings tab.
The tab is expanded and the relevant fields appear as shown in the following figure:

- Under Manomano Product Advanced Price Settings, do the following steps:
- In the Manomano Product Price list, select one of the following options:
- Increase by Fixed Price: If selected, then the Enter Amount field appears.
- Increase by Fixed Percentage: If selected, then the Enter Percentage field appears.
Enter the numeric value to increase the price of the Manomano, product price by the entered value % of Magento price
For Example,
Magento price + 5% of Magento price.
Magento Price = 100
Select Increase By Fixed Percentage option
Enter Percentage = 5
100 + 5% of 100 = 100 + 5 = 105
Thus, Manomano Product Price = 105 - Decrease by Fixed Price: If selected, then the Enter Amount field appears.
- Decrease by Fixed Percentage: If selected, then the Enter Percentage field appears.
Enter the numeric value to decrease the price of the Manomano product price by the entered value % of Magento price.
For Example,
Magento price – 5% of Magento price.
Magento Price = 100
Select Decrease By Fixed Percentage option
Enter Percentage = 5
100 – 5% of 100 = 100 – 5 = 95
Thus, Manomano Product Price = 95
- In the Manomano Product Price list, select one of the following options:
- Click the Save Config button to save the entered values.
- Click the Order Settings tab.
The tab is expanded and the relevant fields appear as shown in the following figure:
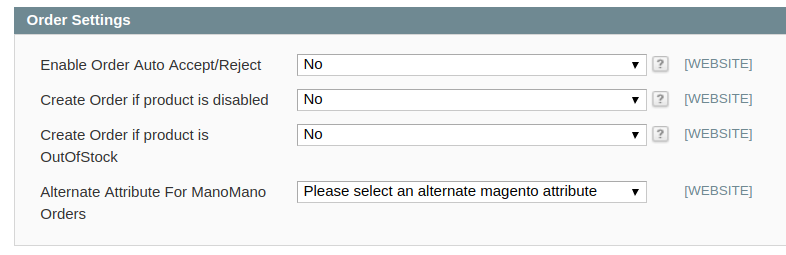
- Under Order Settings, do the following steps:
- In the Enable Order Setting Choose Yes or No to Enable or Disable Auto order Accept/Reject. By choosing Yes the request for all the orders will go to ManoMano. By selecting No the acknowledgment request will not be sent.
- Choose Yes/No in Create Order if product is Disabled as you wish to create include disabled products in the orders.
- Choose Yes/No in Create Order if products is Out of stock. By choosing Yes, the out of stock products will be included in the orders.
- Choose the Alternate attribute for ManoMano Orders from the fropdown menu.
- Click the Save Config button to save the entered values.
- Click the Cron Settings tab.
The tab is expanded and the relevant field appears under the Cron Settings section as shown in the following figure:
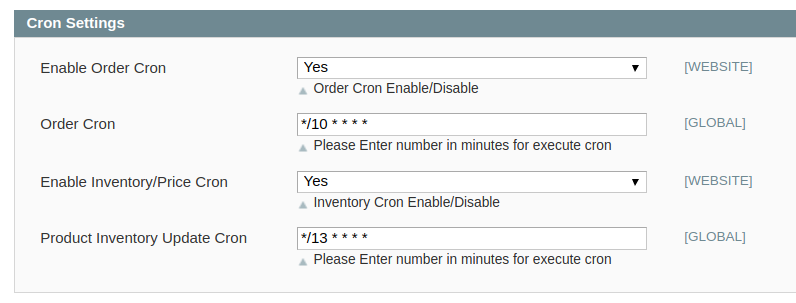
- Under Cron Settings, do the following steps:
- In the Enable Order Cron Settings list, select Yes to enable the cron settings.
Note: Only when the admin selects Yes, the Order Cron, Product Inventory Update Cron, and Product Inventory Update Cron fields appear as shown in the following figure: - In the Enable Order Cron list, select Yes to enable the order cron.
- In the Order Cron box, enter the required value in minutes to execute the Order cron.
- In the Enable Inventory / Price Cron list, select Yes to enable the order cron.
- In the Product Inventory Update Cron box, enter the required value in minutes to execute the Inventory cron.
- Click the Save Config button.
- In the Enable Order Cron Settings list, select Yes to enable the cron settings.


