Once the extension is successfully installed in the Magento store, the eBay menu appears on the top navigation bar of the Admin Panel. The merchant has to first create a seller account in the eBay seller panel. Once the seller account is created and is approved by eBay.
Procedure to set up the configuration settings in the Magento Admin panel
Go to the Magento Admin panel.
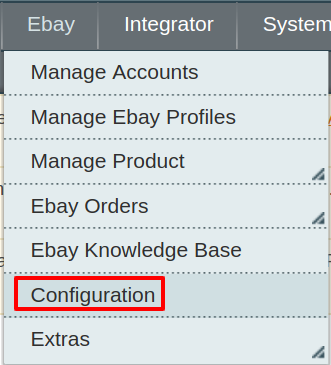
On the top navigation bar, point to the eBay menu.
The menu appears as shown in the following figure:
Click Configuration.
The Ebay Configuration page appears as shown:
In the right panel, click eBay API Settings section and it will expand as shown:
In the Ebay Debug Mode, select Yes to enable the Ebay Integration extension for Logging.
The extension will only get activated once you select yes here.
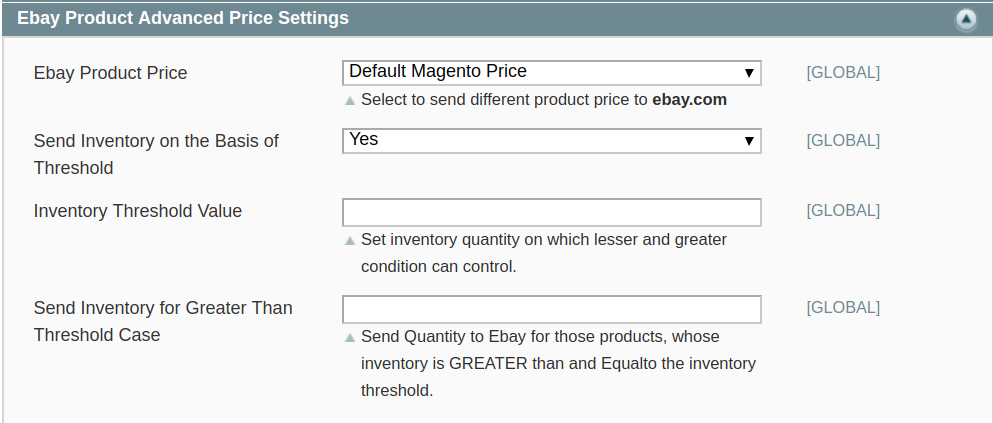
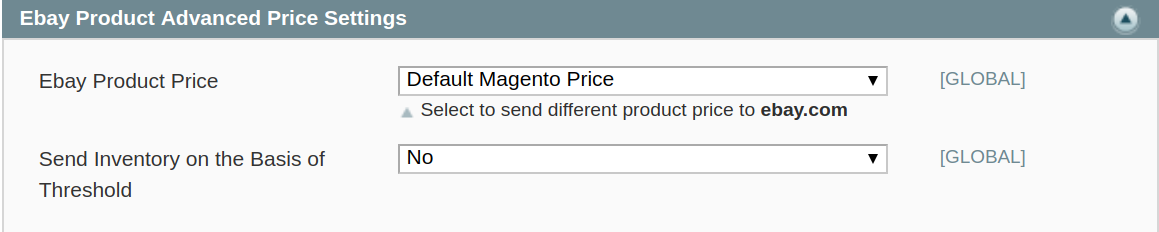
Now move to eBay Product Advanced Price Settings. As you click on it the section gets expanded as:In the Ebay Product Price list, select one of the following options:
Increase by Fixed Price
Increase by Fixed Percentage
Decrease by Fixed Price
Decrease by Fixed Percentage
a) Increase by Fixed Price: If selected, then the Enter Amount field appears. Now suppose if you enter 50 in the field and your product is available on Magento for 100, the product will be available on eBay for 150 as you have chosen increased by fixed price and have entered the amount of 50; so it will be added to the price for which the product is available on Magento and the resultant amount will be reflected on eBay, which is 150 in this case.
b) Increase by Fixed Percentage: If selected, then the Enter Percentage field appears. Enter the numeric value to increase the price of the Ebay, product price by the entered value % of Magento price For Example, Magento price + 5% of Magento price. Magento Price = 100 Select Increase By Fixed Percentage option Enter Percentage = 5 100 + 5% of 100 = 100 + 5 = 105 Thus, Ebay Product Price = 105
c) Decrease by Fixed Price: If selected, then the Enter Amount field appears. Now suppose if you enter 50 in the field and your product is available on Magento for 100, the product will be available on eBay for 50 as you have chosen decreased by fixed price and have entered the amount of 50; so it will be subtracted from the price for which the product is available on Magento and the resultant amount will be reflected on eBay, which is 50 in this case.
d) Decrease by Fixed Percentage: If selected, then the Enter Percentage field appears.
Enter the numeric value to decrease the price of the Ebay product
price by the entered value % of Magento price For Example, Magento price – 5% of Magento price.isa Magento Price = 100 Select Decrease By Fixed Percentage option Enter Percentage = 5 100 – 5% of 100 = 100 – 5 = 95 Thus, Ebay Product Price = 95
In Send Inventory on the basis of threshold, select Yes and the section expands as:
Enter the Inventory Threshold Value in the next section, Enter the threshold value of the products on your eBay store. The threshold value of the products can be selected by the as per customer’s desire.
In Send Inventory Greater Than Threshold Case Enter the number of products to be displayed on the eBay Marketplace if your inventory value reaches greater than or equal to the threshold value entered above.
This is the number is constant even though
Now move to eBay product global settings. As you click on it the section expands as:
In Select Reason For Ending Item, From the drop down menu choose the reason due to which you wish to end the item.
There are these reasons:
Incorrect
Lost or Broken
Not Available
Other Listing Error
Sell to High Bidder
Sold
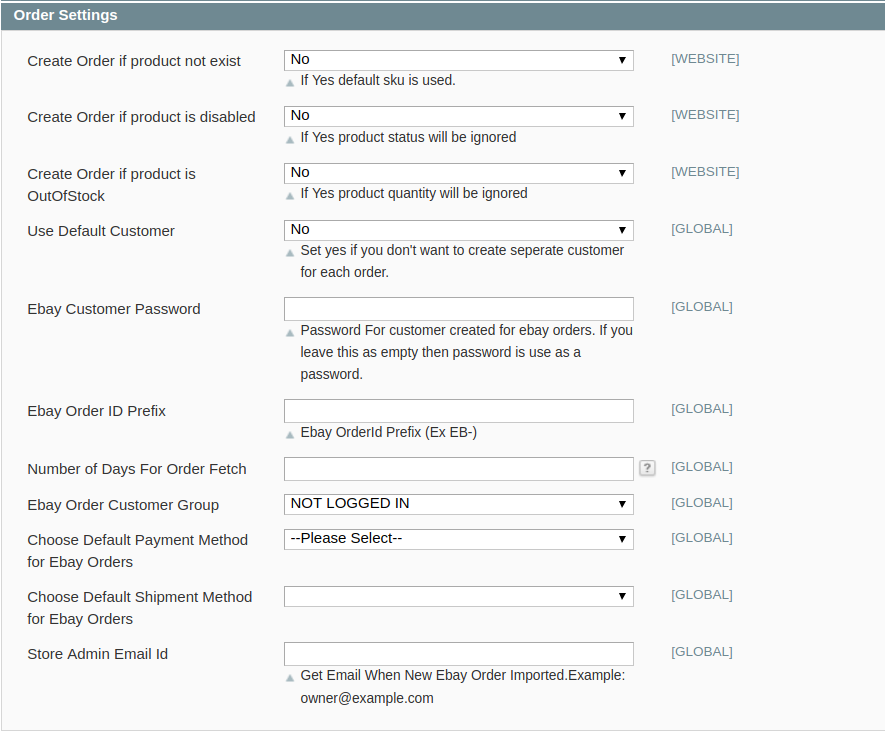
On clicking the Order Settings tab, the section expands as:
In Create Order if Product does not exist, select No if you don’t want the orders to be created in the case of non-existence of ordered products. Select Yes if you want the orders to be created for products that do not exist. In this case of selecting Yes, the default product SKU is used.
In Create Order if product is disabled, select No if you don’t want the orders to be created if a product is disabled. Select Yes if you want the orders to be created for products that are disabled. In this case of selecting Yes, the product status will be ignored.
In Create Order if product is Out of Stock, select No if you don’t want the orders to be created if products are out of stock. Select Yes if you want the orders to be created for products that are out of stock. In this case of selecting Yes, the product quantity will be ignored.
In Use Default Customer,
Select No if you want to create real customers for each order.
Select Yes if you don’t want to create real customers for each order. If you select Yes in this field, some more fields will appear asking you to enter some more information namely, eBay Customer Last Name, eBay Customer First Name, and eBay Customer Email. The expanded fields will appear as highlighted in the image below:
In eBay Customer Last Name, enter the last name for customer.
In eBay Customer First Name, enter the first name for customer.
In eBay Customer Email, enter the email for customer.
5. In Ebay Customer Password field Use Default Customer field, enter the password for customers created for eBay orders. In case this field is left unfilled, ‘password’ will be used as a password.
6. In Ebay Order ID Prefix, enter the prefix that you want to be added to all your eBay orders.
7. In Number of Days For Order Fetch, enter the number for last ‘number of days’ for which you want the orders to be fetched. For example, if you enter 30 in it, orders of last 30 days would be fetched.
8. In Ebay Order Customer Group, select from General/ Wholesale/ Retailer/ Not Logged In.
9. In Choose Default Payment Method for Ebay Orders, select from the payment modes given.
10. In Choose Default Shipment Method for Ebay Orders, select from the shipment methods for the shipment of your orders.
11. In Store Admin Email Id, enter the email id on which you will be getting a notifying message whenever a new eBay order has been imported.
Now move on to eBay Payment Details section. Click and the section expands as:
Enter the PayPal email address on which you wish to receive the payments.
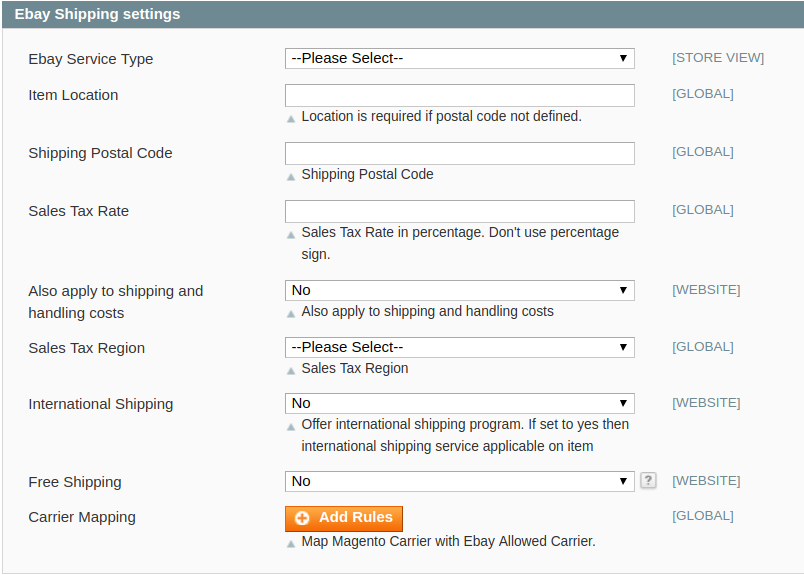
Click on eBay shipping settings and the section expands as:
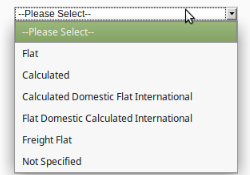
In Ebay Service Type, select from the services shown in the image below
If the postal code is not defined then enter the location in the Item Location Section.
Enter the Shipping Postal Code in the next field. This is the postal code of the location from where the product will be shipped to the customers.
In Sales Tax Rate, enter the tax rate for the products in accordance with the product location.
In Also apply to shipping and handling costs, enter Yes if you want the sales tax to be applied to shipping and handling too. (It is applicable only for the USA)
In Sales Tax Region, enter the region according to which the sales tax will be levied on the products.
In , you may select Yes if you want to ship your products internationally. If no, select No.
In Free Shipping, select Yes if you want to offer free shipping to users.
In next field, map the Magento shipping carrier with that of eBay. It is required for the automated shipment. For that, click on Add Rules as highlighted in the image below:
52. On clicking it, the fields will appear as shown below,
Map the Ebay Carrier with Magento Carrier. You need to map the Ebay Carrier with Magento Carrier for the automated order shipment.
You may Add Rules by clicking on the button and similarly, delete the rules as well by clicking on Delete button.
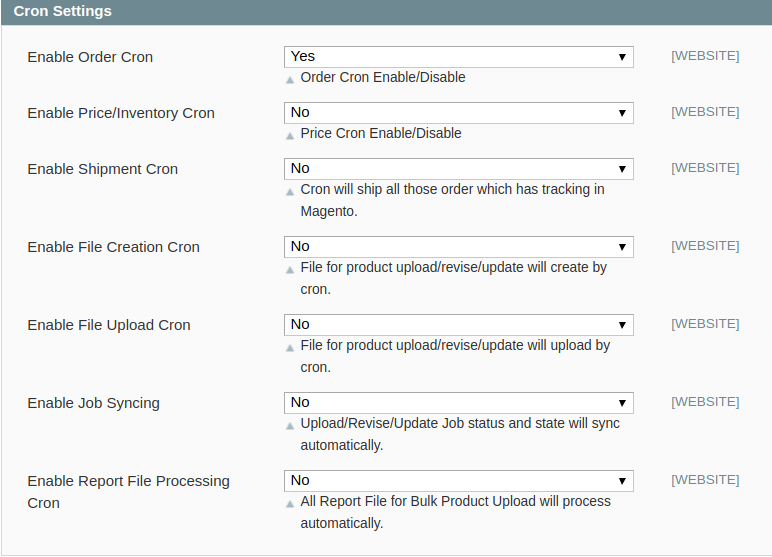
Now move to the last section of the configuration settings ie Cron Settings. Click on Cron Settings and the section will expand as:
In Enable Order Cron, if you select Yes. By doing this it will automatically fetch all those orders whose payment completed on eBay.
In , select Yes if you want the Price and Inventory cron to run and the price and inventory to be synced and updated between Magento and Ebay.
In , select Yes if you want the Shipment cron to run periodically. Cron will ship all those orders which have to track in Magento.
In , select Yes if you want the file for product upload/revise/update cron to run periodically. In this case, all the file creation will process automatically.
In Enable File UploadCron, select Yes if you want the file upload cron to run periodically. In this case, the file for product upload/revise/update will be uploaded by cron.
In Upload/Revise/Update the Job status and the state will sync automatically.
In , select Yes if you want the Report File Processing cron to run periodically. In this case, all Report File for Bulk Product Upload will process automatically.
Once all the actions have been taken, click on SaveConfig button on the top right side of the page. The configuration will be saved.


 In the Ebay Product Price list, select one of the following options: