3.1.Manage Vendor Configuration
Marketplace Configurations
Goto CED Marketplace > Vendor Configuration to configure the extension.
The following screen will open.
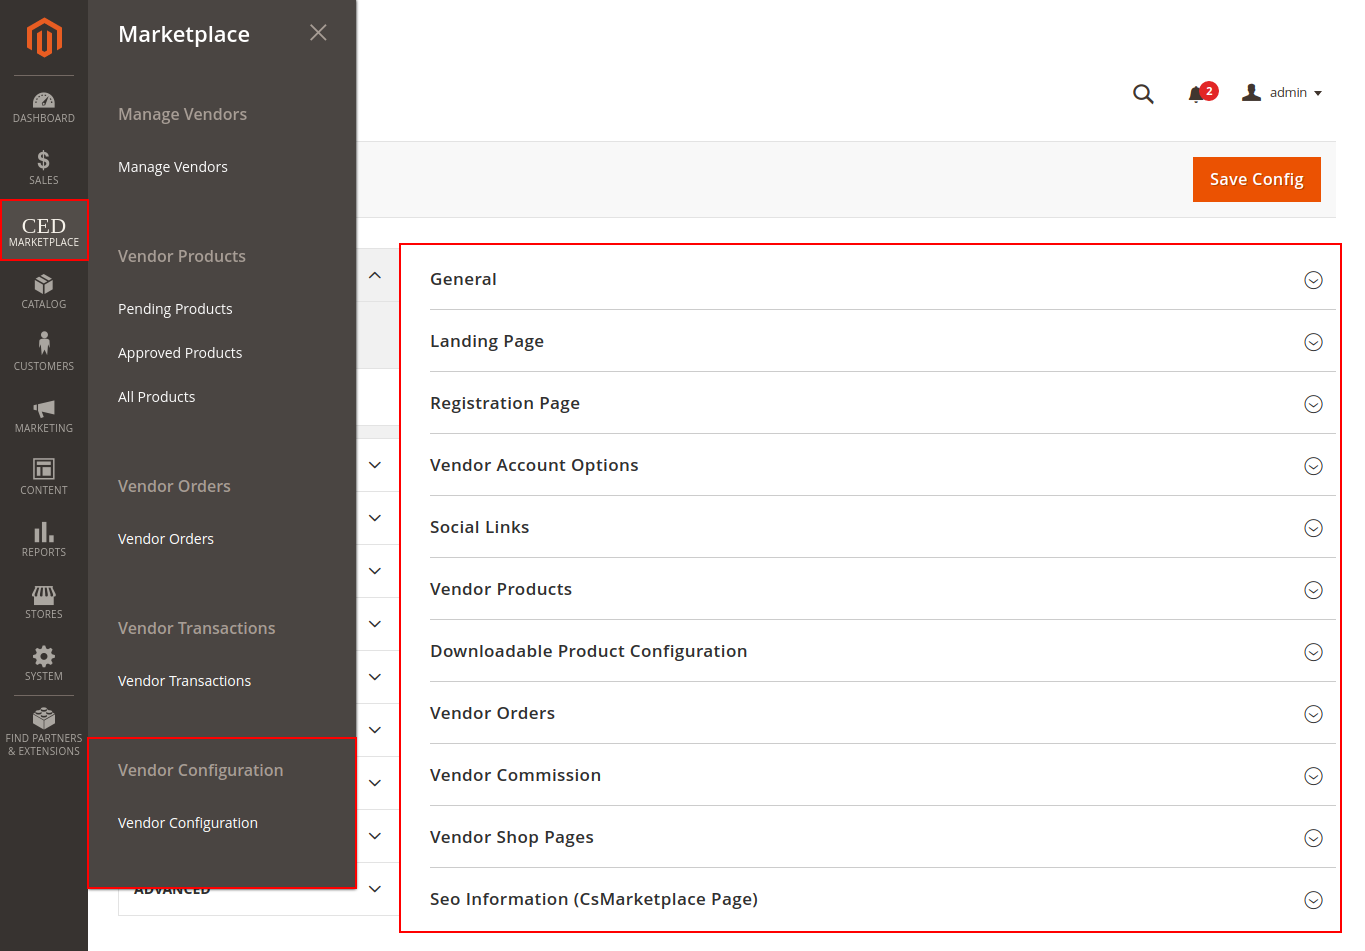
General
- Enable Marketplace Module: Select Yes to enable or No to disable the marketplace module.
- Vendor Transaction ID Generation: Select Auto to auto-generate a unique Transaction ID for vendor payment/transaction or choose Manual to enable manual input field for the Transaction ID.
- Enable RTL Theme: Select Yes to enable RTL or Right-to-Left design layout on vendor panel and registration page. The RTL user interface displays text in a right-to-left orientation for use with languages written this way, such as Hebrew and Arabic.
- Select Theme Color: Select the theme color option for the vendor panel.
- Login/Sign Up Header Logo: Set logo to appear on the header of vendor signup and login page.
- Enable Footer: Enable Footer on vendor signup and login page.
- Footer Content: Enter the contents for the footer.
- Enable Terms and Conditions: Enable the Terms and Conditions checkbox on the vendor signup page.
- Enter Terms and Conditions Static Block ID: Enter the Identifier of the custom block for the contents of the Terms and Conditions.

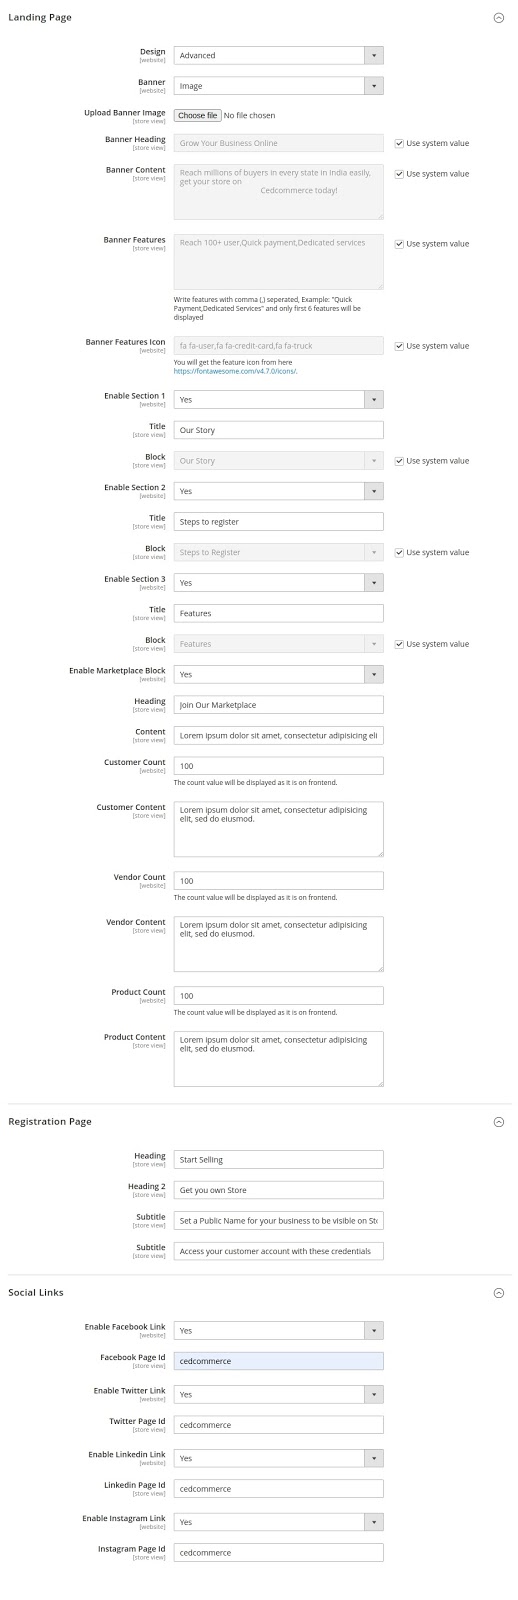
Vendor Landing Page Configuration
Now in this section of landing pages, we will guide you to the Vendor landing pages configuration,
- Design: Select Basic for a simple vendor signup page. Switch to Advanced to add a customizable vendor landing page with custom blocks, video, and social links. Following settings comes under the Advanced option setting to customize your vendor landing page.
- Banner: Set the banner option to Image or Video. Video option lets you add the same video in three different formats to ensure cross-browser compatibility. Set the Banner Heading and Banner Content for the Banner. Add up to 6 Banner Feature Icons(comma-separated font-awesome icon classes) and set the Banner Features(comma-separated) for icon description.
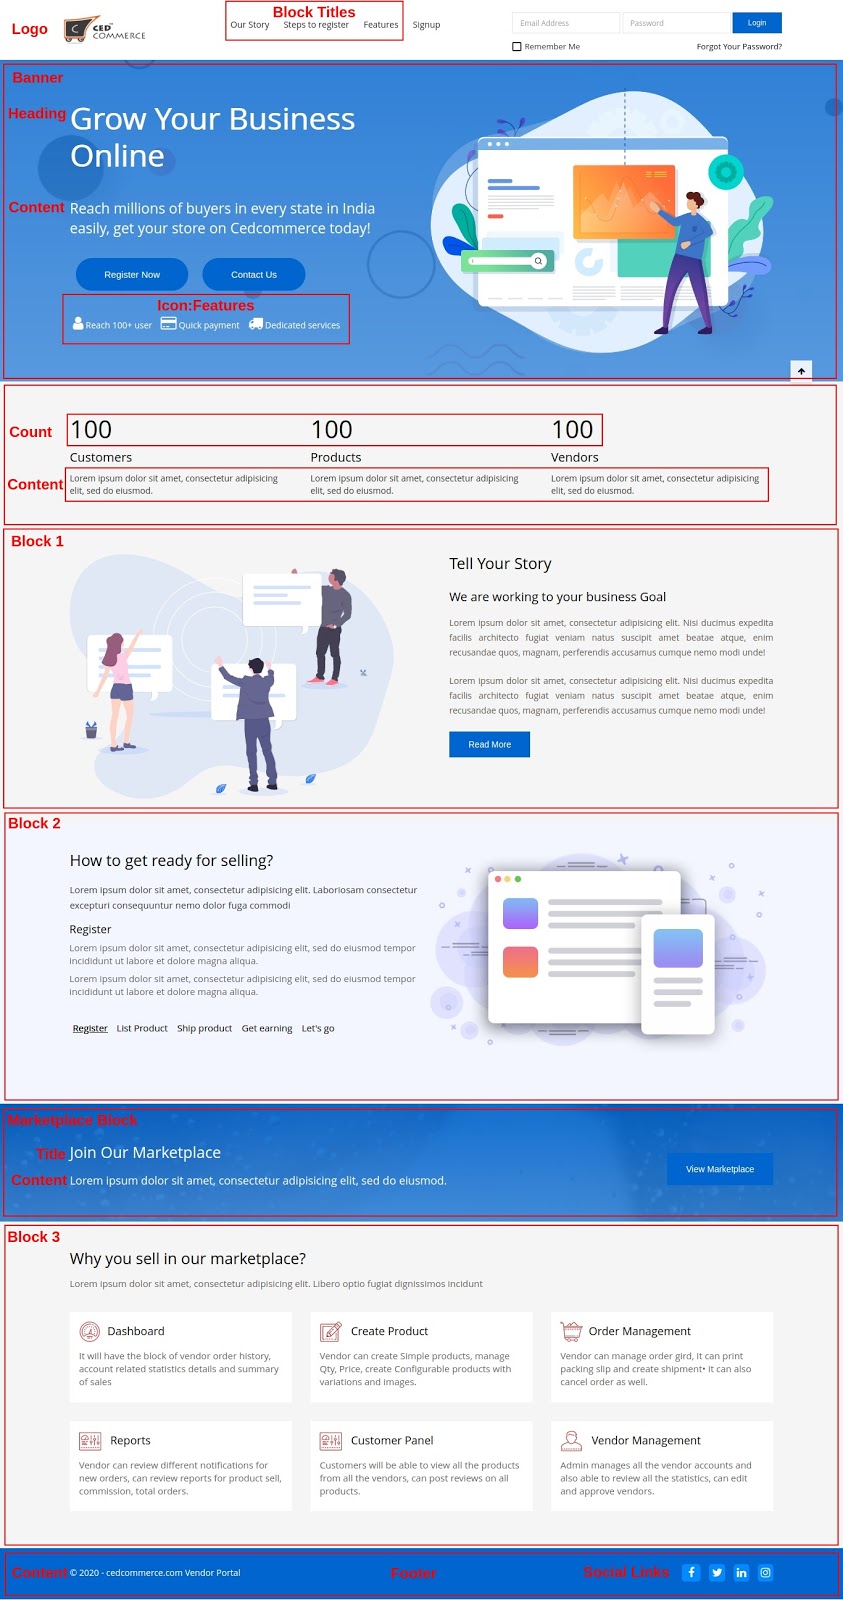
- Enable Section 1-3: Set to Yes to enable up to 3 custom blocks below the banner, each with a custom Title and Block contents. Enable Marketplace Block: Set to Yes for a preset block with a marketplace link and set the Heading and Content.
- Marketplace Figures: Set the Count of Customer, Vendor, and Product with respective Content.
- Social Links: Add the social media handles or username of the social media accounts for links in the footer.
 Customer Count, Vendor count, Product count Refer to below images on frontend view;
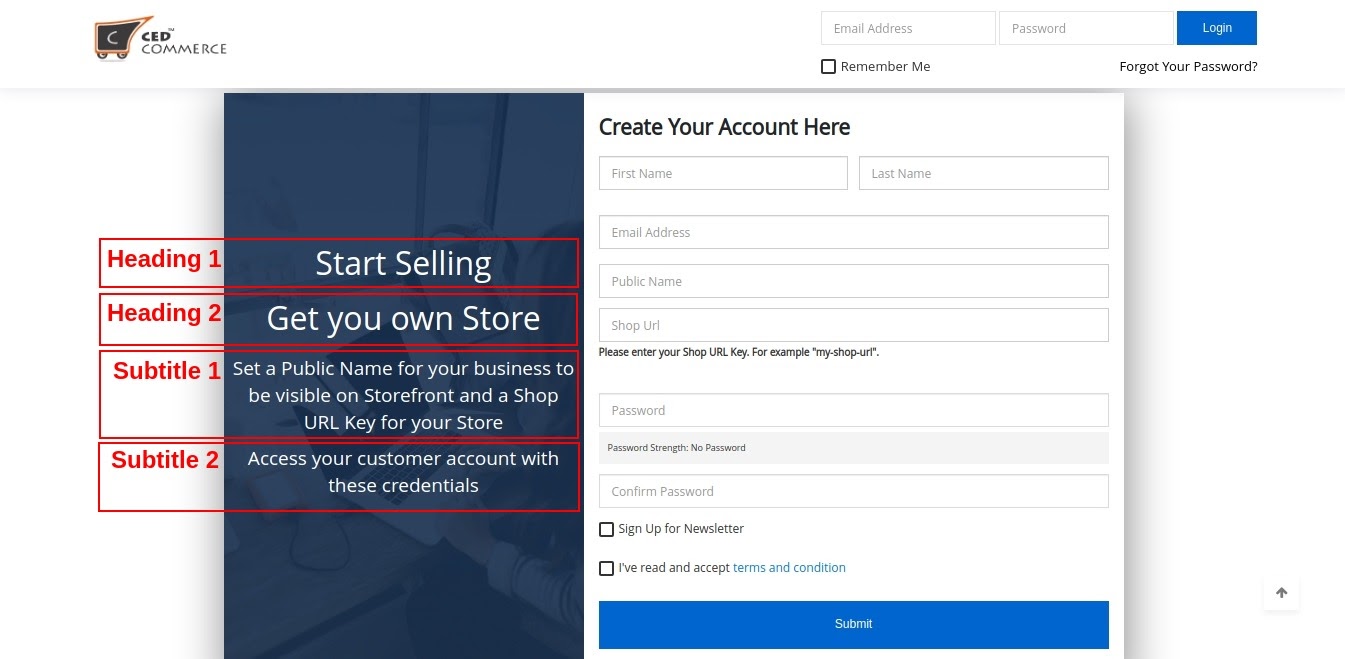
Registration Page
Add custom Headings and Subtitles on the vendor registration page.
Now in this section of registration pages, we will guide you on the registration page configuration and information, refer to the below images.
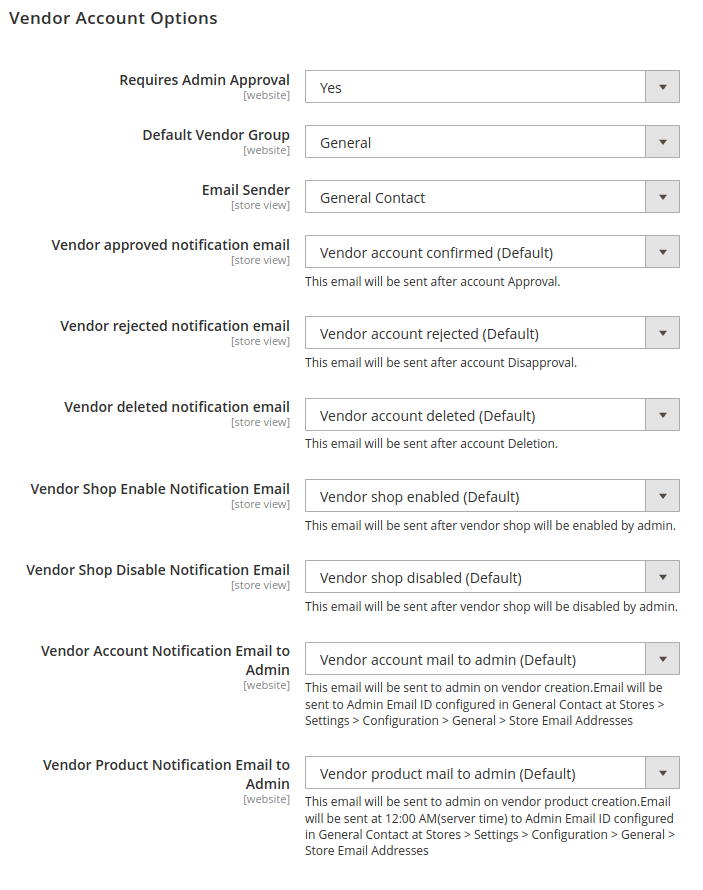
Vendor Account Configurations
- Default Vendor Group: Sets the vendor group for new vendor accounts. Install Vendor Group Addon to create multiple groups, assign resources, and set configurations for each vendor group.
- Email Sender: Set the store contact that appears as the sender of the emails.
- Vendor Approved Notification Email: Identifies the template sent to the vendor on account approval.
- Vendor Rejected Notification Email: Identifies the template sent to the vendor on account disapproval.
- Vendor Deleted Notification Email: Identifies the template sent to the vendor on account deletion.
- Vendor Shop Enable Notification Email: Identifies the template sent to the vendor on shop enable.
- Vendor Shop Disable Notification Email: Identifies the template sent to the vendor on shop disable.
- Vendor Account Notification Email to Admin: Identifies the template sent to General Contact in Store Email Addresses for new vendor registrations.
- Vendor Product Notification Email to Admin: Identifies the template sent at midnight(server time) to General Contact in Store Email Addresses for all new vendor products created in a day.
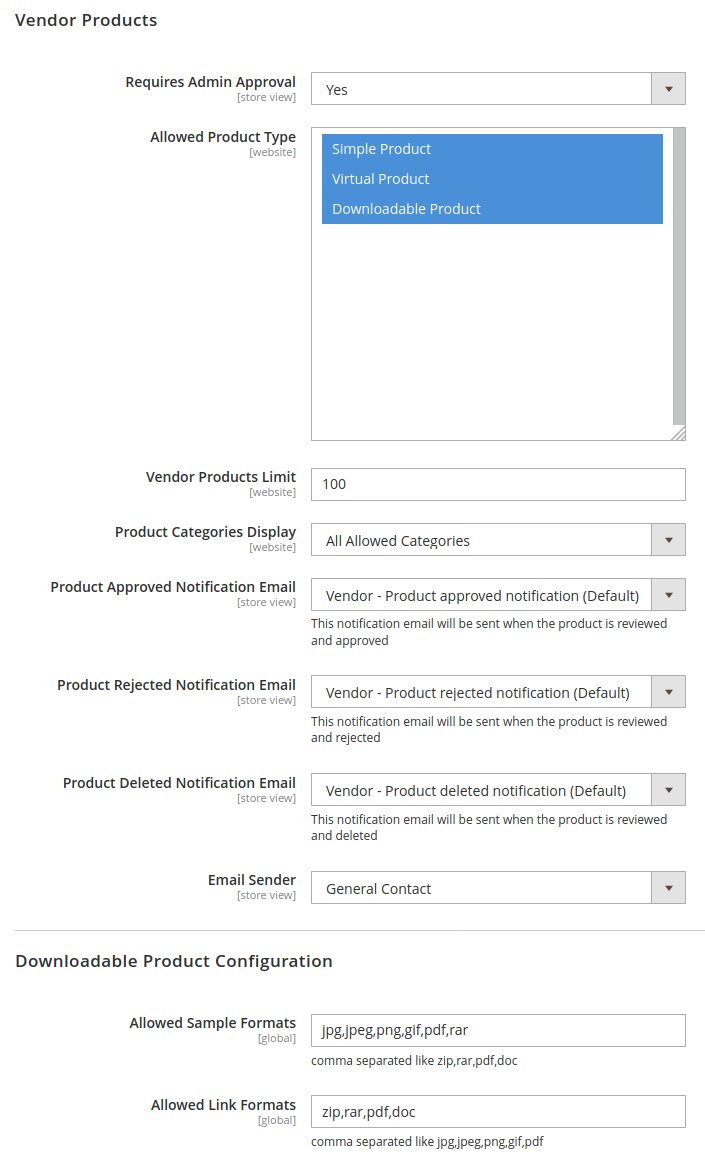
 Vendor Product Configuration
- Require Admin Approval: Set to Yes to make admin approval mandatory for new vendor products. Set to No for auto-approval.
- Allowed Product Type: Select the product types allowed for vendors. These are simplified versions of Magento Simple, Virtual and Downloadable product types with limited attributes and support only the default attribute set. Upgrade with Vendor Product Addon to enable all 6 Product Types of Magento for vendors.
- Vendor Product Limit: Set the limit of catalog size for vendors.
- Product Categories Display: Set to All Allowed Categories option to allow vendors to assign products to any of the Magento categories. Set to Specific Categories option to restrict category access for vendors. In the Specific Categories option, select all the parent categories of the selected category until the root category.
- Product Approval Notification Email: Identifies the template sent to the vendor on product approval.
- Product Rejected Notification Email: Identifies the template sent to the vendor on product disapproval.
- Product Deleted Notification Email: Identifies the template sent to the vendor on product deletion.
- Email Sender: Set the store contact that appears as the sender of these emails.
- Downloadable Product Configuration: Set the allowed extensions(comma-separated) for samples and links of Downloadable products for vendors.
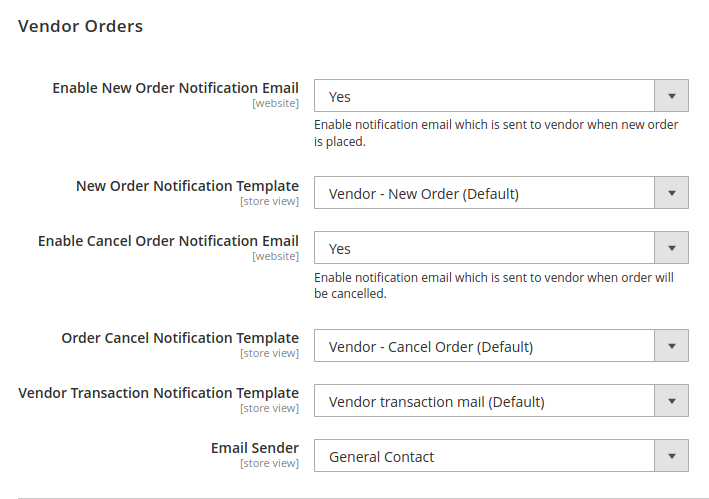
Vendor Order Configuration
- Enable New Order Notification Email: Set to Yes to send a new order email to the vendor.
- New Order Notification Template: Identifies the template sent to the vendor for a new order.
- Enable Cancel Order Notification Email: Set to Yes to send an order cancellation email to the vendor.
- Order Cancel Notification Template: Identifies the template sent to the vendor on order cancellation.
- Vendor Transaction Notification Template: Identifies the template sent to the vendor on transaction/payout.
- Email Sender: Set the store contact that appears as the sender of these emails.
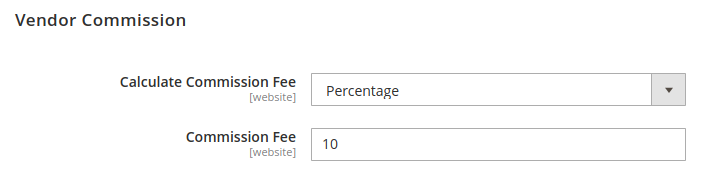
Vendor Commission Configuration
Admin can set the commission fee for vendors and define how it will be calculated whether percentage-wise/fixed.
- Calculate Commission Fee: Admin can set the commission fees based on the following option. Currently, available types of commission methods are Percentage and Fixed.
- Commission Fee: Admin can set the amount of the commission fee that needs to be deducted from the vendor’s total order (excluding admin shipping) sent to the vendor by admin. The commission is calculated on vendor total order (excluding admin shipping) for percentage commission calculation and order item quantities from the fixed commission. The value provided here depends on what commission type you have selected (Fixed or Percentage).
Marketplace Pages Configuration
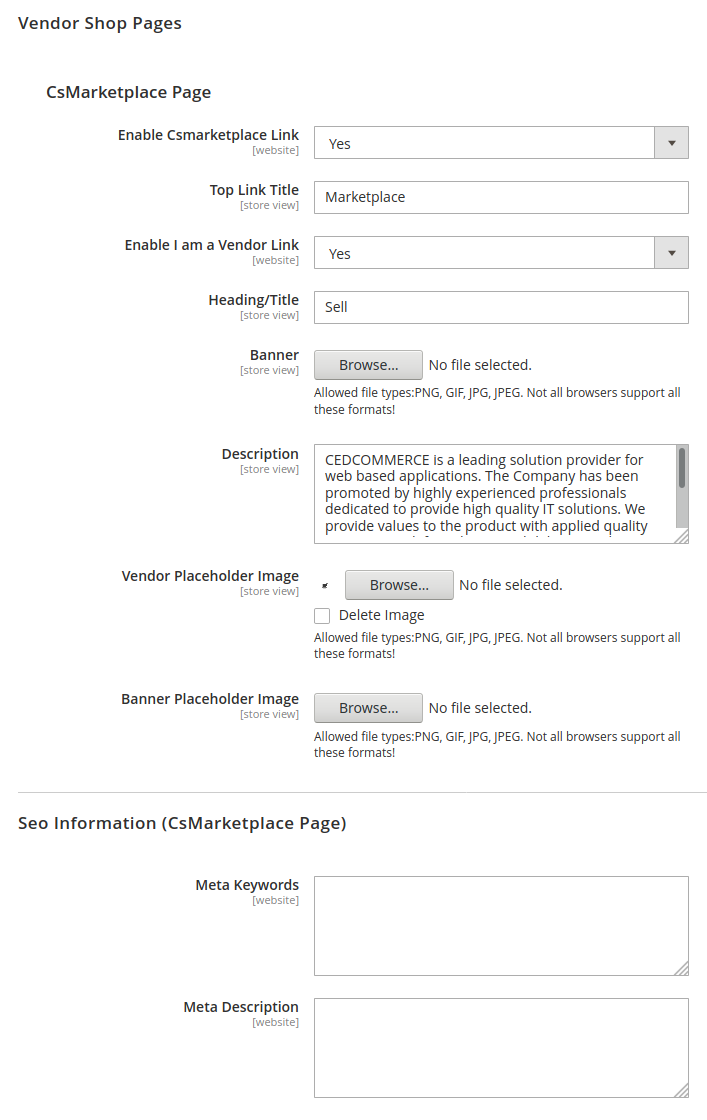
Vendor Shop Pages
- Enable CsMarketplace Link: This option allows you to display or hide the “Marketplace” link available on the Store frontend header. It allows frontend users to view registered vendors on the marketplace.
- Top Link Title: This is the text that you want to get displayed on the header or Marketplace after enabling the Cs Marketplace Link.
- Enable I am a Vendor Link: This option helps the admin to display or hide the top link for vendor/sellers signup and login at the frontend header.
- Heading/Title: This is a heading title text for the vendor signup/login. whatever text is provided in the field will reflect at the frontend.
- Banner: This banner added by the admin here is displayed on the “Marketplace”.
- Description: Add a description of the marketplace.
- Vendor Placeholder Image: Admin can configure placeholder image for vendor profile.
- Banner Placeholder Image: Admin can configure placeholder image for banner the file type is PNG, GIF, JPG, JPEG.
SEO Information (Cs marketplace page)
This will help the website in increasing the quantity and quality of traffic to your website through organic search engine results.
- Meta Keywords: These are specific types of meta tags that appear in the HTML code of a Web page and help tell search engines what the topic of the page is. It can be set by the admin for the website.
- Meta Description: It is a brief description of the page, related to keywords.