
4.3.4.5.7.Booking Settings
↑ Back to TopThe admin has rights to enable or disable the features of the extension to the Customers at front-end.
To define the booking settings
- Go to the Admin
- On the left navigation bar, click the BOOKING menu, and then click Booking Settings.
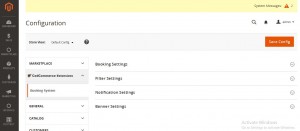
The Configuration page appears.
- In the left navigation panel, click the CedCommerce Extensions menu, and then click Booking System.
The page appears as shown in the following figure:
- In the right panel, click the Booking Settings tab to expand the associated fields and enter the required values.
- Under Booking Settings, do the following steps:
- In the Enable in frontend list, select Yes, to enable booking links at the customer front-end.
- In the Booking Address list, select Yes, to display map at the customer front-end.
- In the Show Hotel Top Link list, select Yes, to enable the hotel top link at the customer front-end.
- In the Hotel Top Link Title box, enter the title for the Hotel Top link.
- In the Show Daily Booking Top Link list, select Yes, to enable the daily booking top link at the customer front-end.
- In the Daily Top link Title box, enter the title for the Daily Top link.
- In the Show Hourly Top Link list, select Yes, to enable the hourly booking top link at the customer front-end.
- In the Hourly Top link Title box, enter the title for the Hourly Top link.
- In the Show Appointment Top Link list, select Yes, to enable the appointment top link at the customer front-end.
- In the Appointment Top link Title box, enter the title for the Appointment Top link.
- Click the Filter Settings tab to expand the associated fields and enter the required values.
- Under Filter Settings, do the following steps:
- In the Enable filter list, select Yes, to enable filter at the customer front-end.
- In the Product Attribute box, select required attribute.
- Click the Notification Settings tab to expand the associated fields and enter the required values.
- Click the Banner Settings tab to expand the associated fields and enter the required values.
- Click the Save Config button.
×


