
Delivery Date Settings From Vendor Panel
Once the admin has enabled the add-on, the vendor has to set up the delivery date settings to enable the features of the add-on.
To set up the delivery date settings
- Go to the Vendor panel.
- On the left navigation panel click the Settings menu.
The menu appears as shown in the following figure:
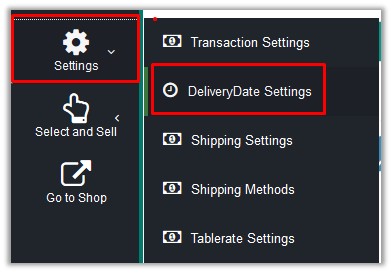
- Click DeliveryDate Settings.
The DeliveryDate Settings page appears as shown in the following figure:
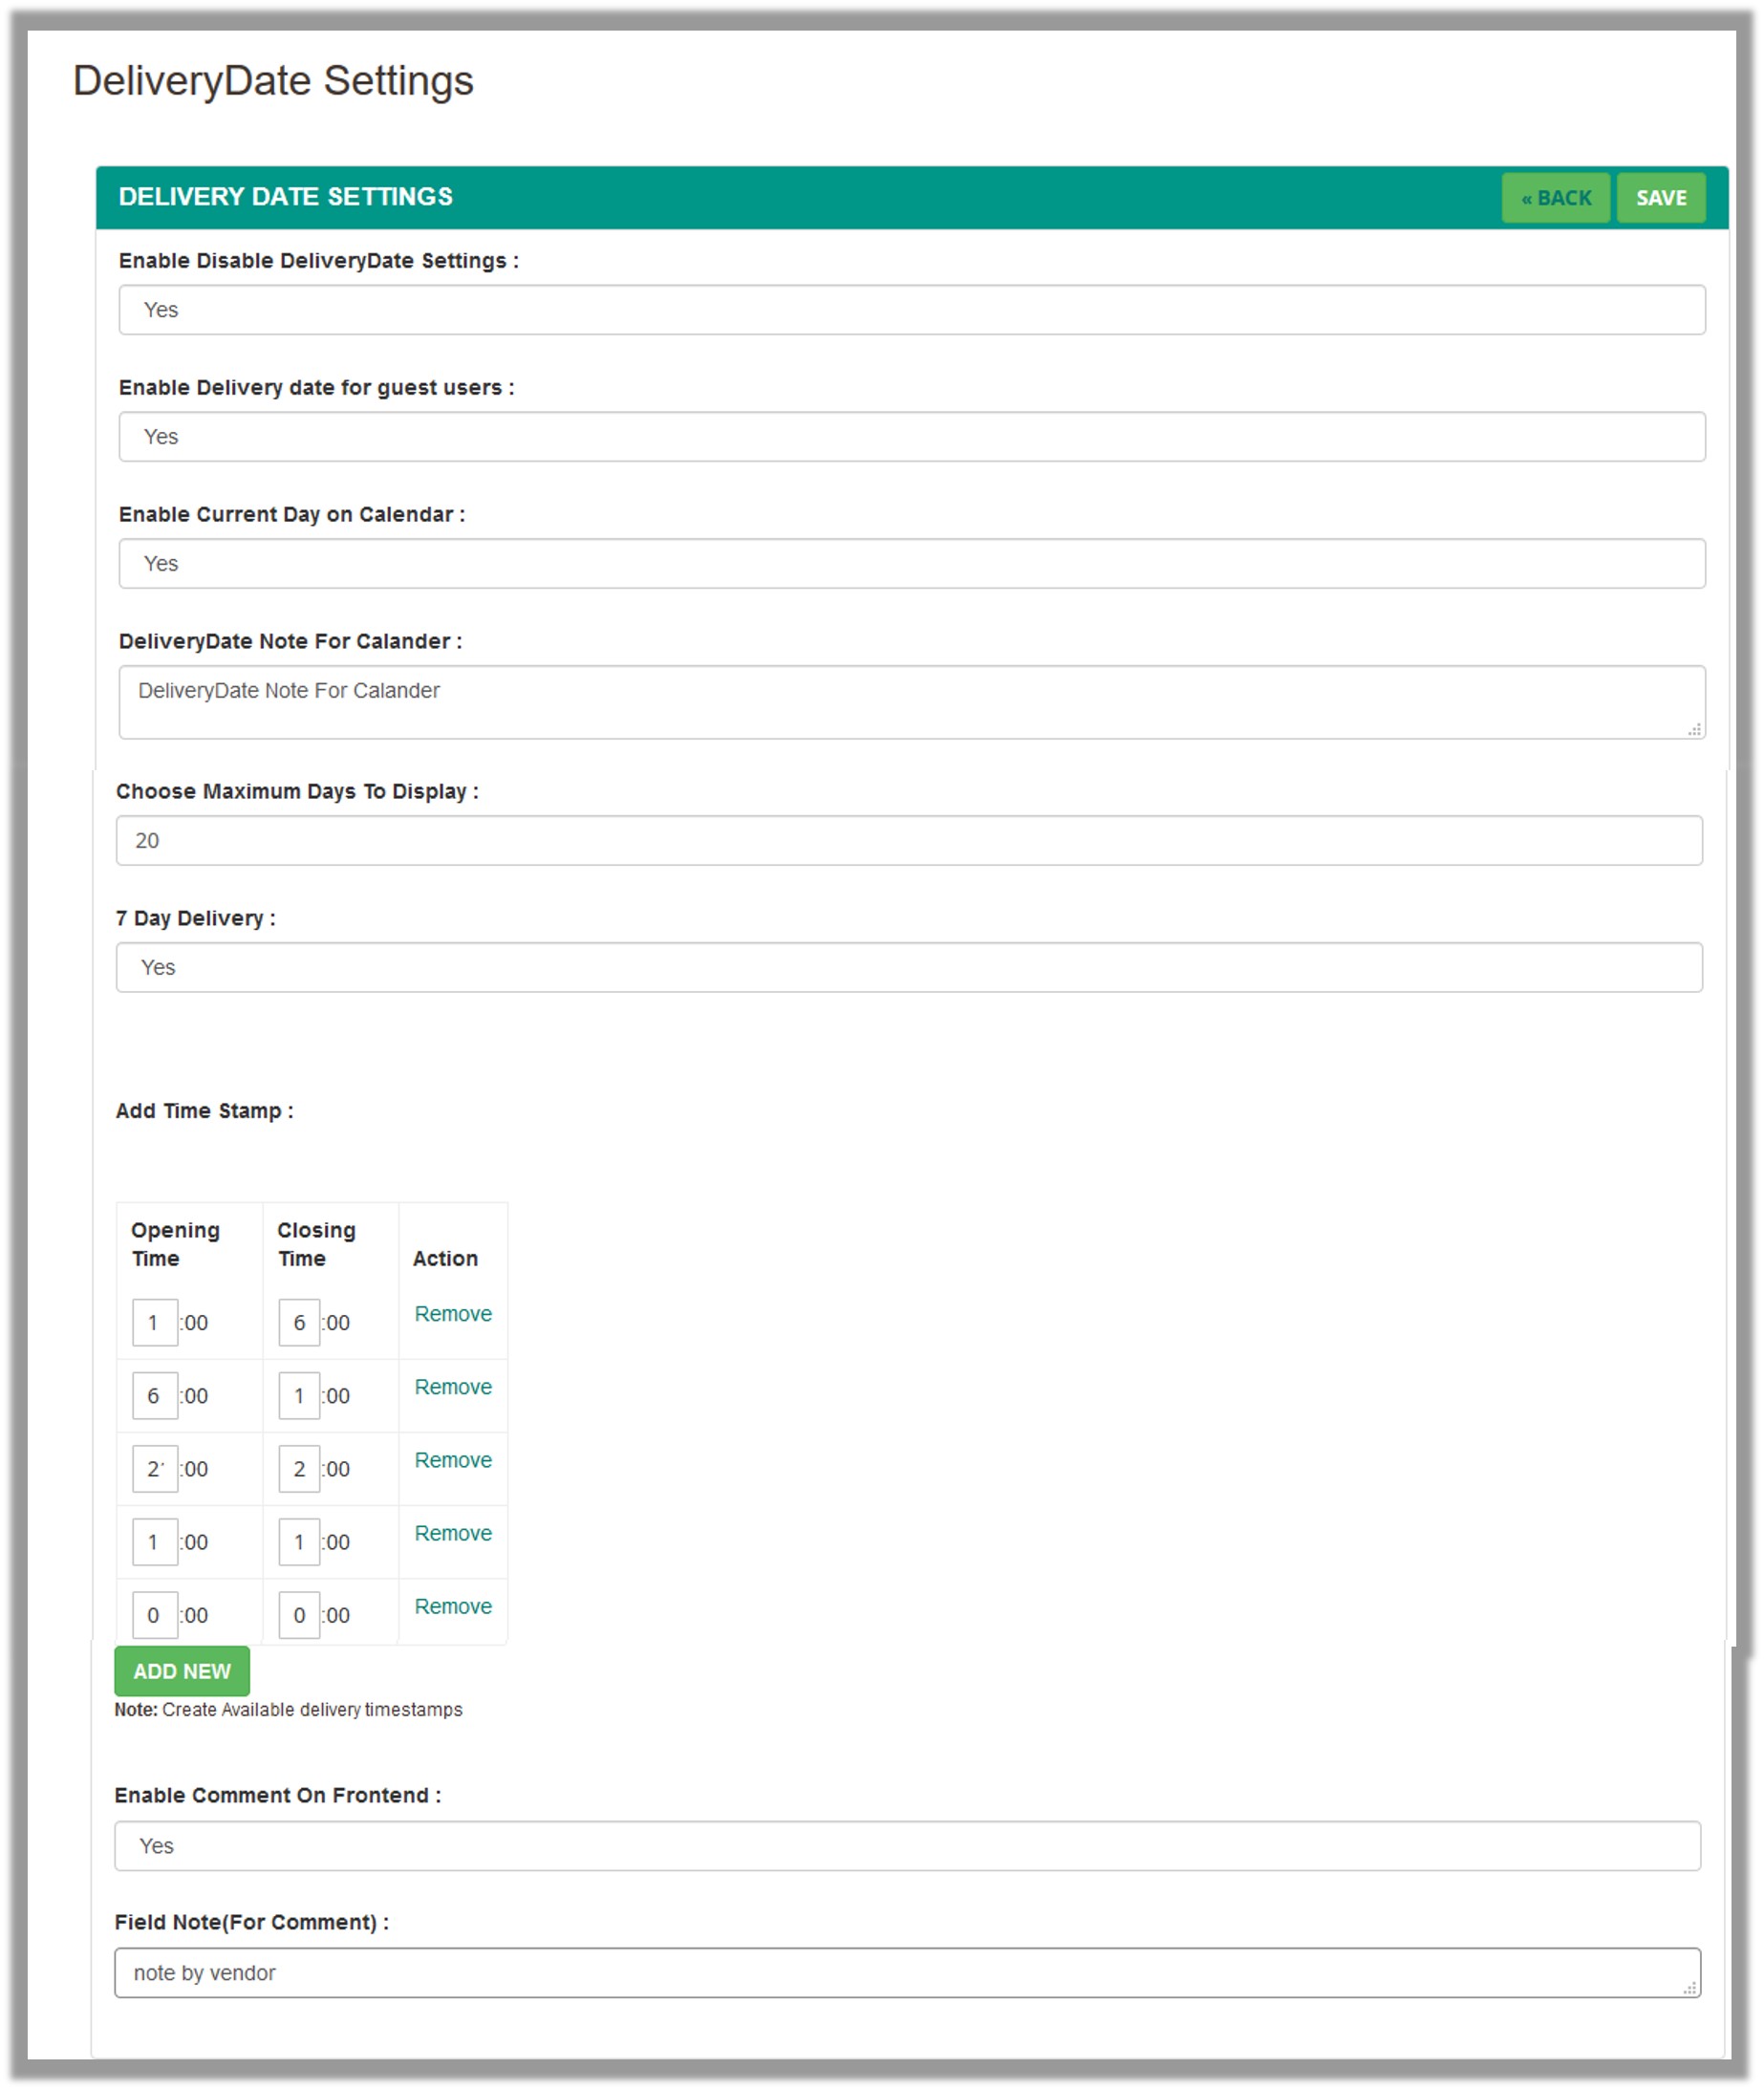
- In the Enable Disable DeliveryDate Settings list, select Yes to enable the Delivery Date Settings.
- In the Enable Delivery date for guest users list, select Yes to enable the Delivery Date Settings for the guest users.
- In the Enable Current Day on Calendar list, select Yes to enable current date in the Calendar.
- In the DeliveryDate Note For Calander box, enter the content for the note relevant to the delivery date.
- In the Choose Maximum Days To Display box, enter the number of days to appear in the Calendar View at front-end during the customers select the shipping method.
- In the 7 Day Delivery list, do one of the following:
- Select Yes to enable all the 7 days of the week.
- Select No to choose the selected days of the week.
The weekdays appear as shown in the following figure:
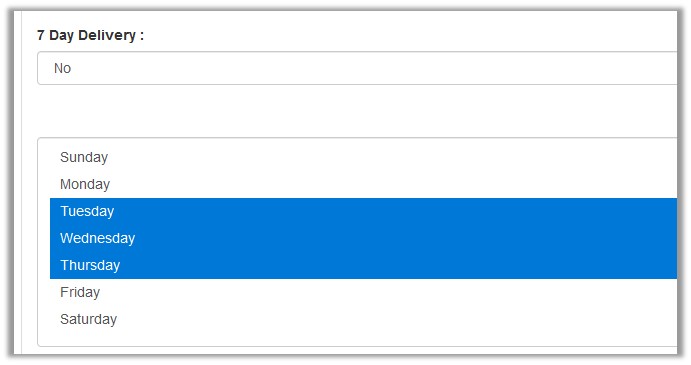
- In the list of the weekdays, select the required days.
- Scroll down to the Add Time Stamp section.
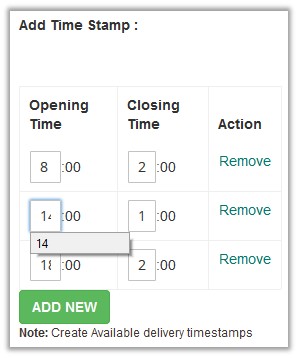
Note: Enter Time from 0 to 23. - Under Add Time Stamp, do the following steps:
- In the Opening Time box, enter the start time of the time slot.
- In the Closing Time box, enter the end time of the time slot.
This time slot available for the customers to select the delivery time of their order as per their convenience. - Click the Add New button to add more time slots.
- In the Enable Comment On Frontend list, select Yes to enable the Comment field at front-end.
This displays the note provided by the vendor and also enables the customers to enter the comment. - In the Field Note(For Comment) box, enter the note.
- Click the Save button.
×


