
Fruugo Other Configurations Settings
Once the store owners have installed the app in the store and completed the four steps procedure of registration and the Fruugo Configuration settings, they have to proceed further with the other configuration settings through the app.
To set up the other configuration settings
- Go to the Fruugo Marketplace Integration app.
The page appears as shown in the following figure:
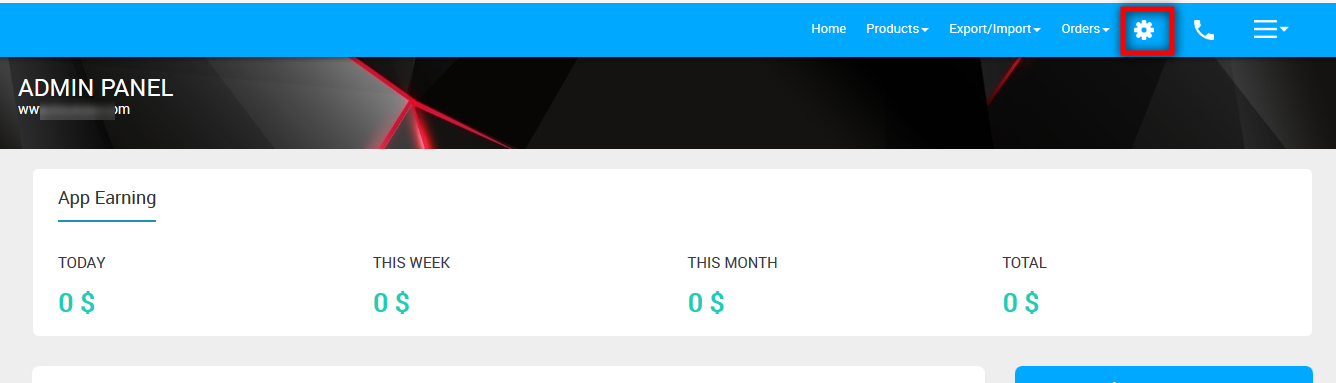
- On the top navigation bar, click the Settings
 icon.
icon.
The Fruugo Configurations page appears as shown in the following figure:
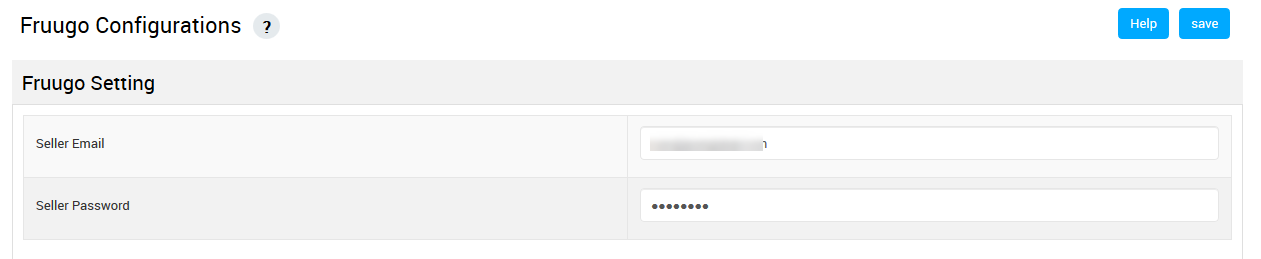
- In the Seller mail Address box, enter the email Id of the Seller account provided by Fruugo.
- In the Fruugo Password box, enter the password of the Seller account provided by Fruugo.
- Scroll down to the Fruugo Order section.
The section appears as shown in the following figure:

- In the Order Sync list, select Yes to enable the order synchronization with the Bigcommerce store. This leads to the automatic creation of Sears orders in your Bigcommerce store from where you can easily ship them.
- Scroll down to the Auto Product Sync section.
The section appears as shown in the following figure:
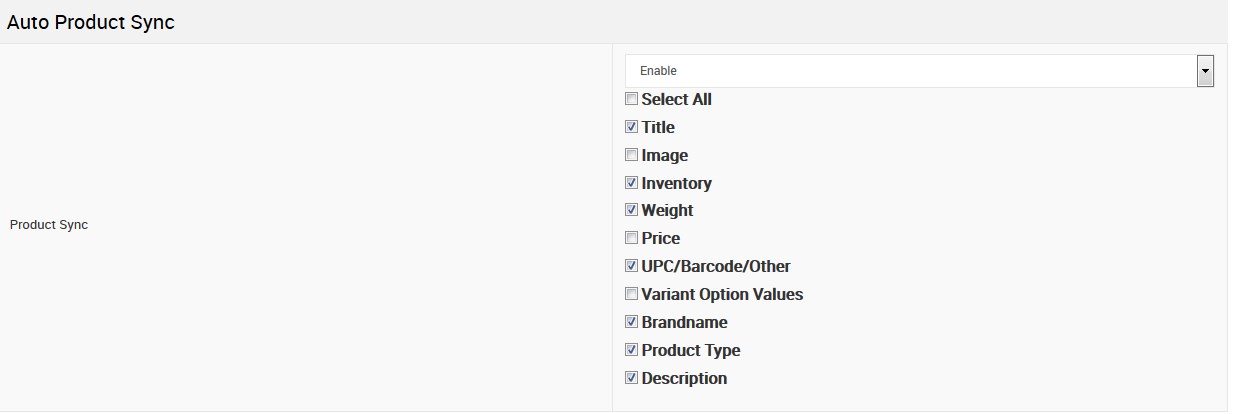
- Under Auto Product Sync, do the following steps:
- In the Product Sync area, select Enable from the list to enable the Product synchronization between the Bigcommerce store and the Sears Marketplace Integration app.
- Select the checkbox associated with the Select All option to synchronize all the attributes of the products.
OR
Select the checkboxes associated with the required product attributes to get synchronized with the store.
- Scroll down to the Product Settings section.
The section appears as shown in the following figure:
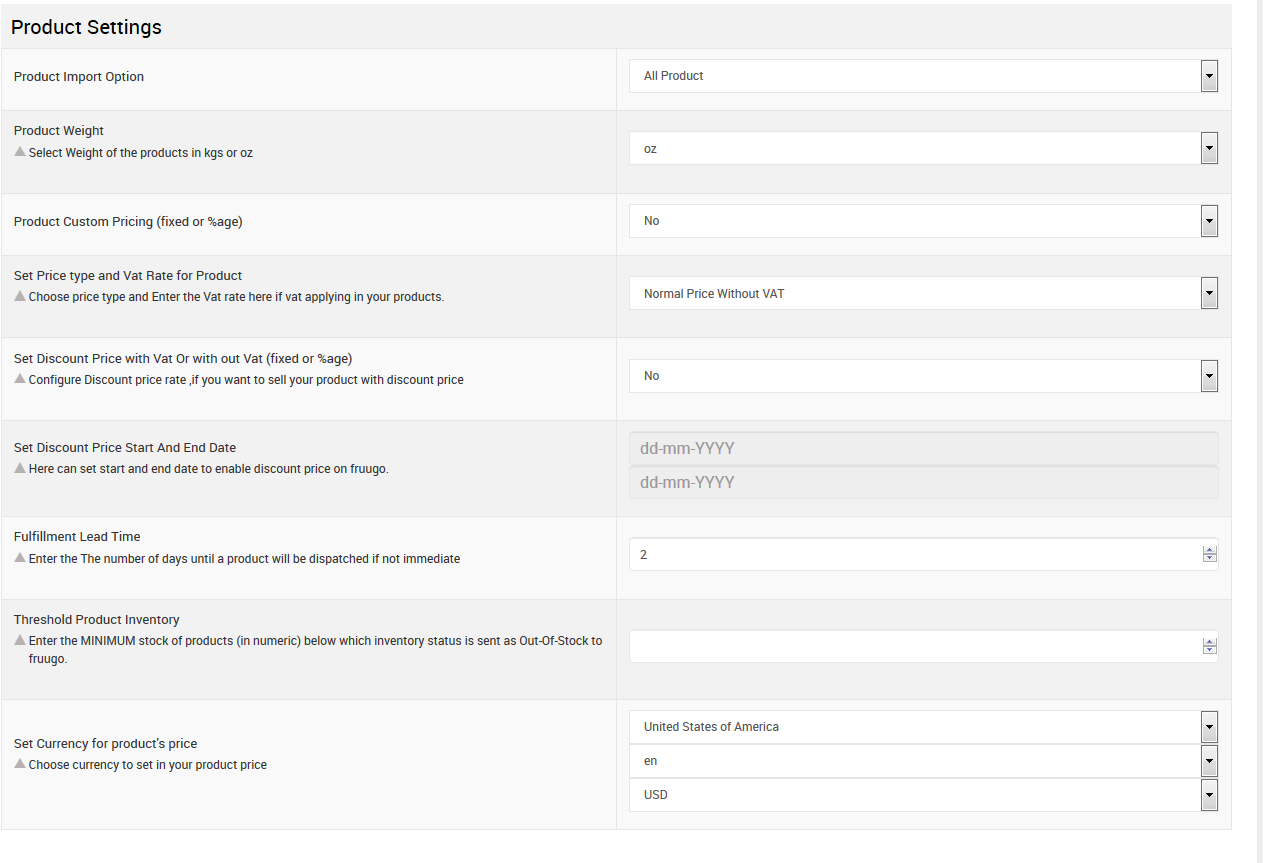
- Under Product Settings, do the following steps if required:
- In the Product Import Option list, select the required option.
- In the Product Weight list, select the required option.
- In the Product Custom Pricing (fixed or %age) list, select Yes to enable it.
Two more lists appear.- Select the required options.
- In the Set Price type and Vat Rate for Product list, select the required option.
- In the Set Discount Price with Vat Or without Vat (fixed or %age) list, select Yes to configure the discount price rate if required.
- In the Set Discount Price Start And End Date area, click the respective box to set start and end date to enable discount price on fruugo.
- In the Fulfillment Lead Time box, enter the required number of days with the help of the Arrow buttons.
Note: The Up Arrow button increases the number, and the Down Arrow button decreases the number - In the Threshold Product Inventory box, enter the minimum count of an item that the store owner wants to keep in stock.
- In the Set Currency for product’s price area, select the Country and the Currency from the respective lists to set the product price.
- Click the Save button.
The Fruugo Configuration settings are saved.
×


