
Walmart Orders
The store admin can manage the orders from the Walmart Orders page. The admin can perform the following tasks:
- Fetch Orders from Walmart
- Update the current Walmart Status of the order on Walmart
- Reject Orders
- View the Order details
- Manage Shipment
To fetch orders from Walmart
- Go to the OpenCart Admin panel.
- On the top navigation bar, move the cursor over the Walmart Integration tab, and point to Orders.
The menu appears as shown in the following figure:

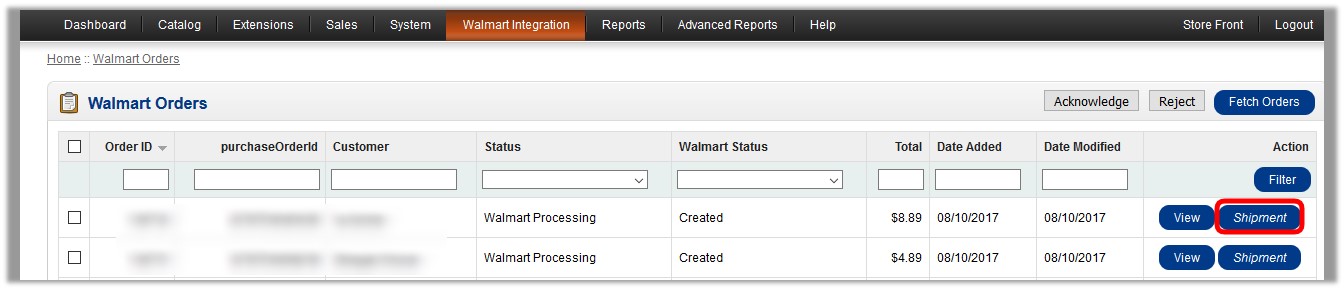
The Walmart Orders page appears as shown in the following figure:
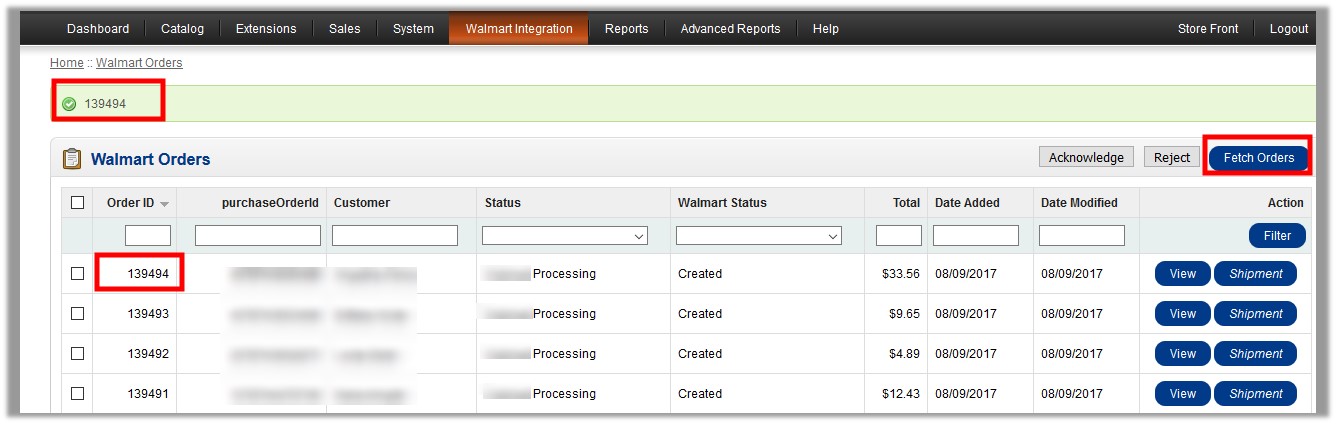
- Click the Fetch Orders button.
The new order is fetched from the Walmart Web site and listed in the Walmart Orders grid. An order Id of the fetched order appears on the page as higlighted.
To update the current Walmart status of the order on Walmart
- Go to the Walmart Orders page.
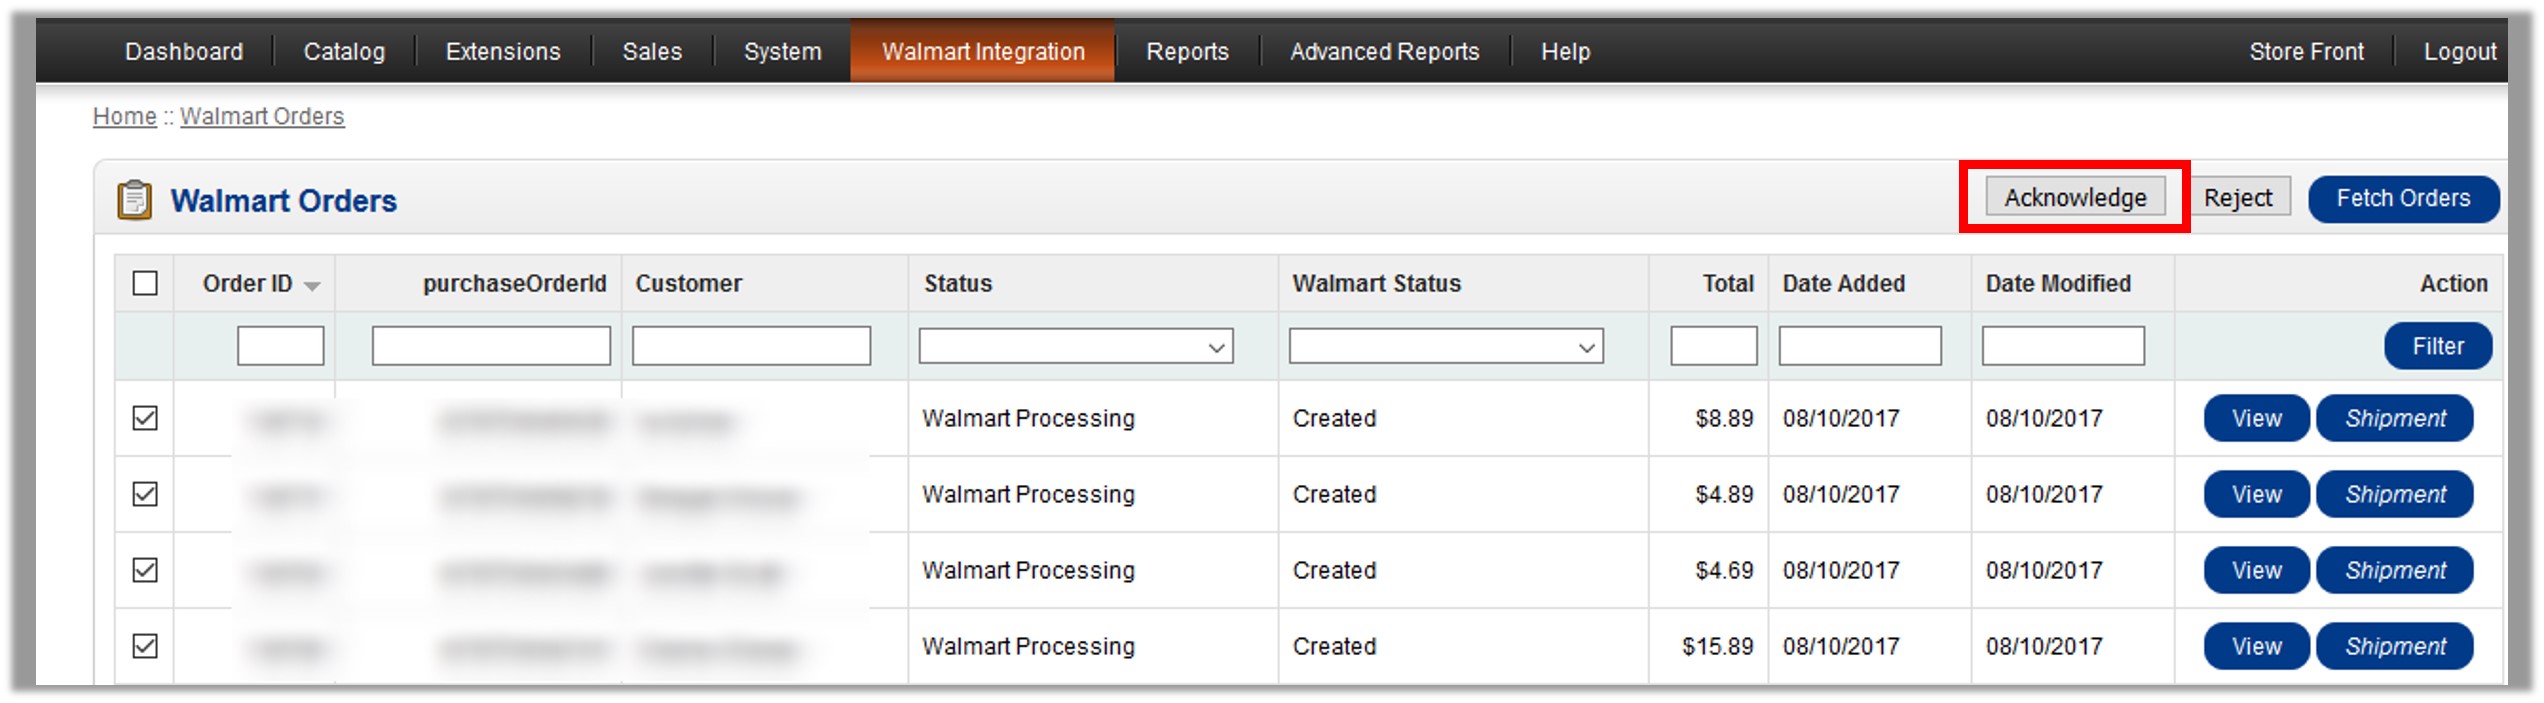
- Select the check boxes associated with the required orders, and then click the Acknowledge button.
The current Walmart status of the order is updated on the Walmart Web site.
To reject the selected orders
- Go to the Walmart Orders page.
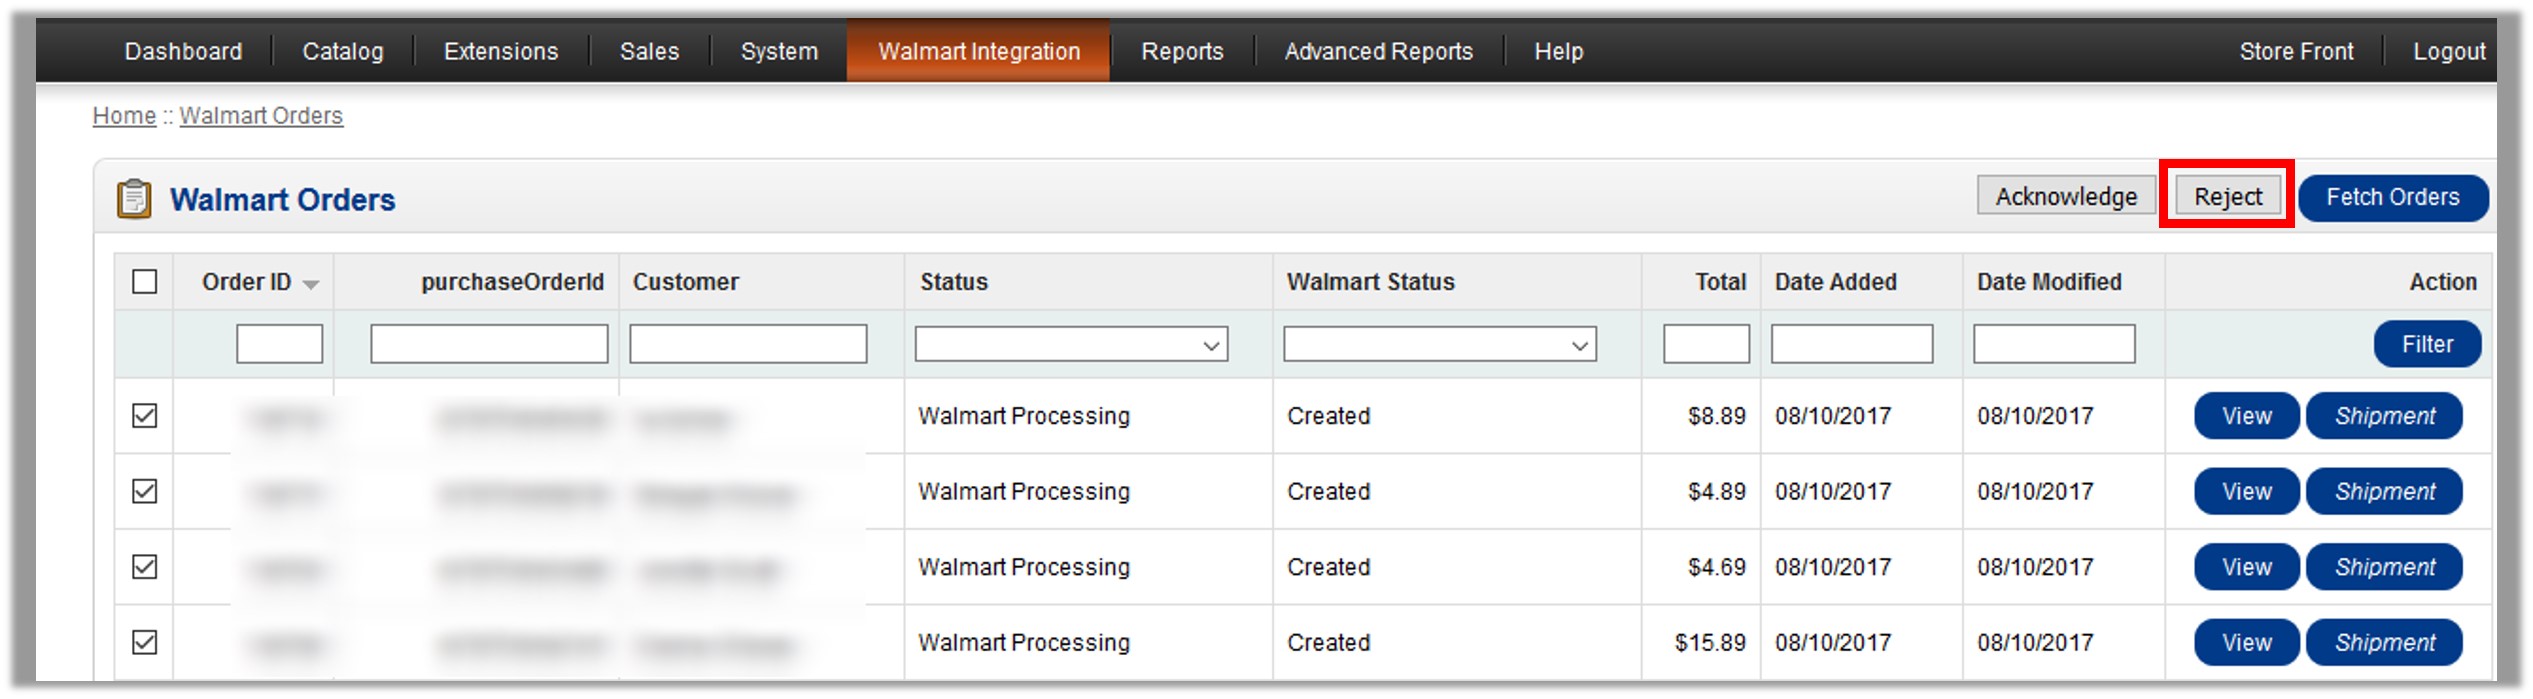
- Select the check boxes associated with the required orders those have to be rejected, and then click the Reject button.
The orders are rejected and listed on the Rejected Orders page.
To view the order details
- Go to the Walmart Orders page.
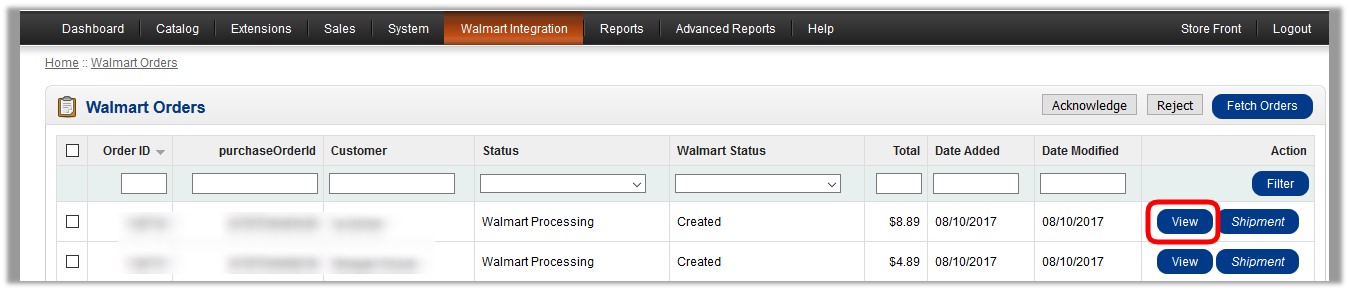
- Click the View link associated with the required order to view the order details.
The order details appear as shown in the following figure:
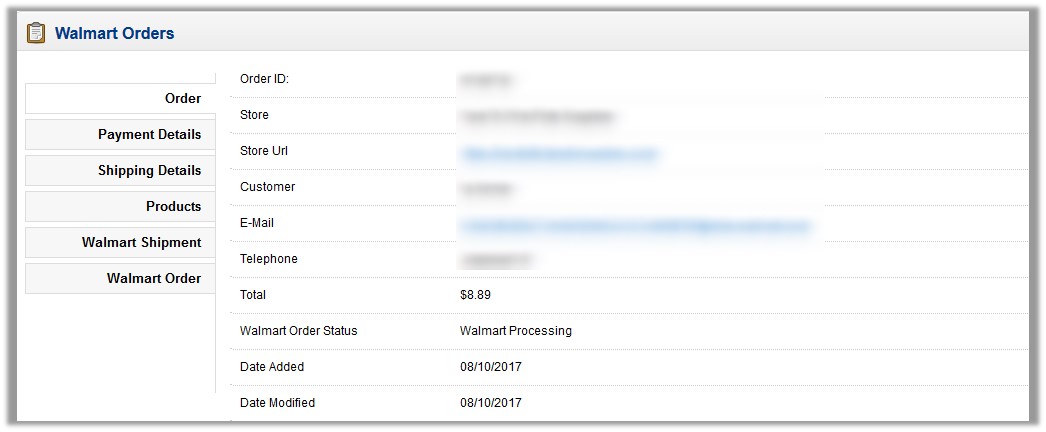
- In the left navigation panel, click the following tabs to view the details of the each tab related to the specific order.
- Payment Details
- Shipping Details
- Products
- Walmart Shipment
- Walmart Order
To manage shipment
- Go to the Walmart Orders page.
- Click the Shipment link associated with the required order to manage the shipment.
The page appears as shown in the following figure:
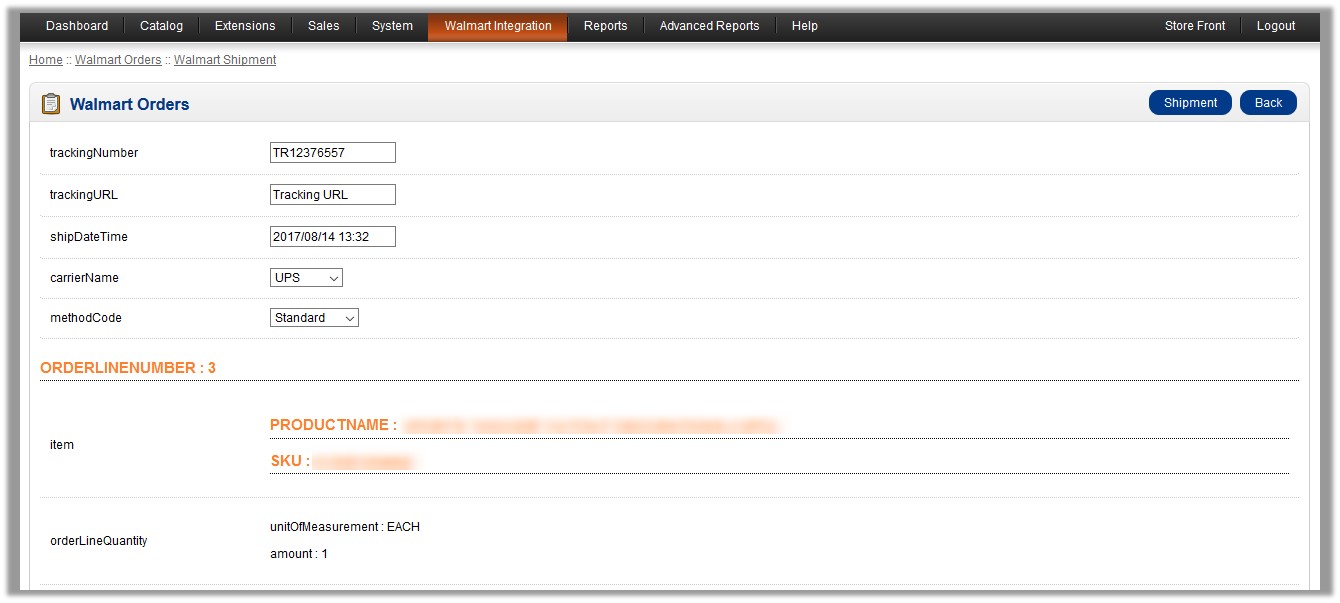
- In the trackingNumber box, enter the tracking number.
- In the trackingURL box, enter the tracking URL.
- In the ShipDateTime box, click the box to enter the required date of shipment.
- In the carrierName list, select the required option.
- In the methodCode list, select the required option.
- Click the Shipment button.
A success message appears.
×


